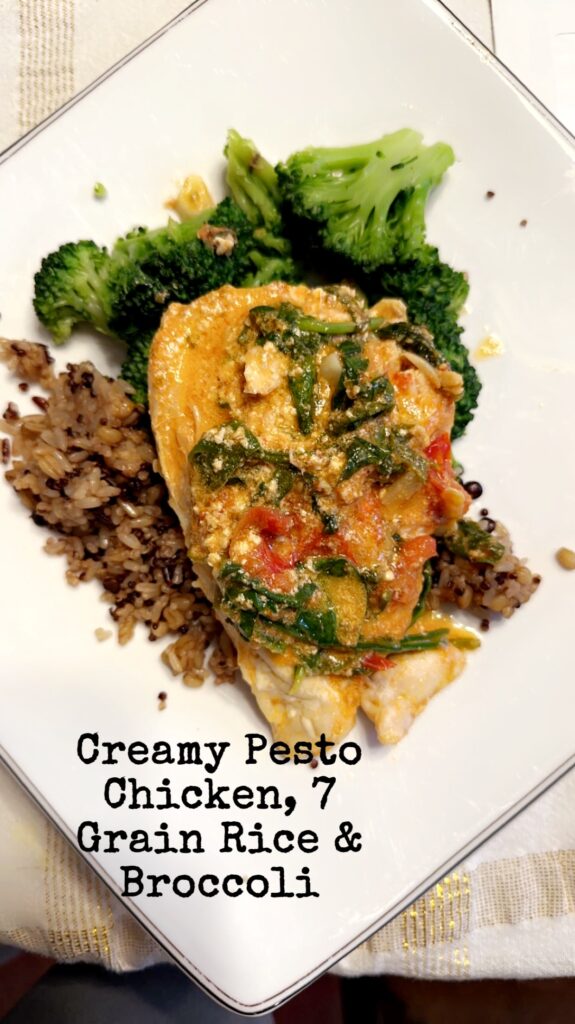
This recipe was a huge hit in our house, so I wanted to share it with you. It’s delicious, quick, and can be cooked in one pan. Clean up is a breeze. I love one pan recipes because the clean up is so much faster.
My kids loved this chicken so much that they both asked for seconds (that’s a major win with a 3 and 6 year old).
I served this chicken with broccoli and 7-grain rice, but you can choose whatever sides sound good to you. Now that I think about it, my Bruschetta Zoodle recipe would probably make a delicious side dish with this meal.
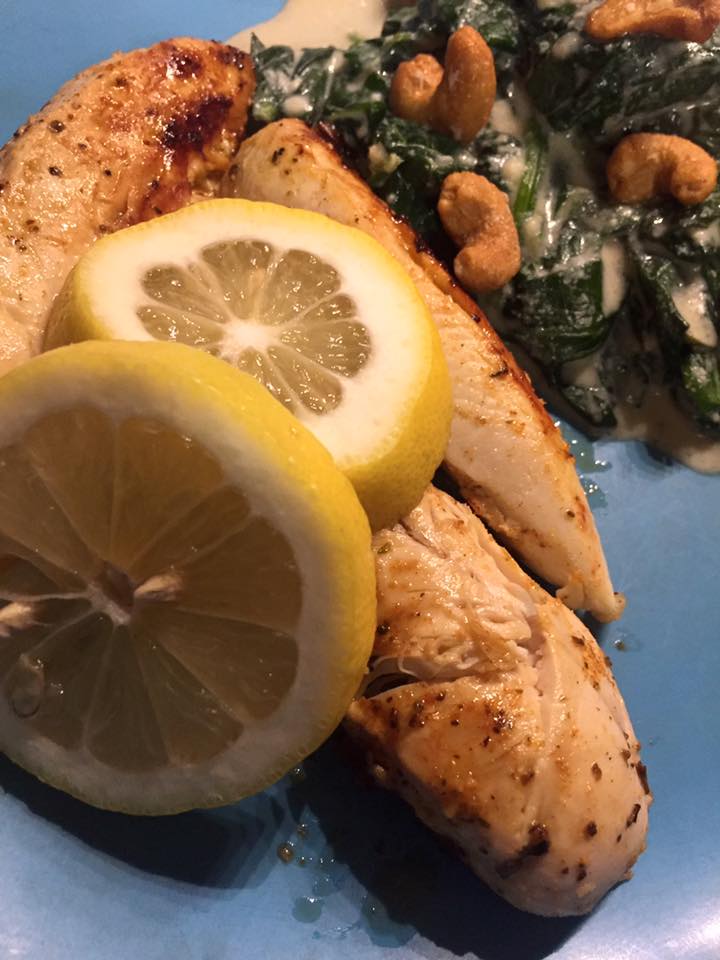
Traditionally, this recipe is made with heavy cream, but I substituted Greek yogurt for a healthier, protein rich addition to the recipe. The results were fantastic. It was still deliciously creamy and it paired perfectly with the pesto.
I hope you enjoy this recipe. Now that I’ve written it up I need to run to the store and refresh my ingredients so that I can make it again.
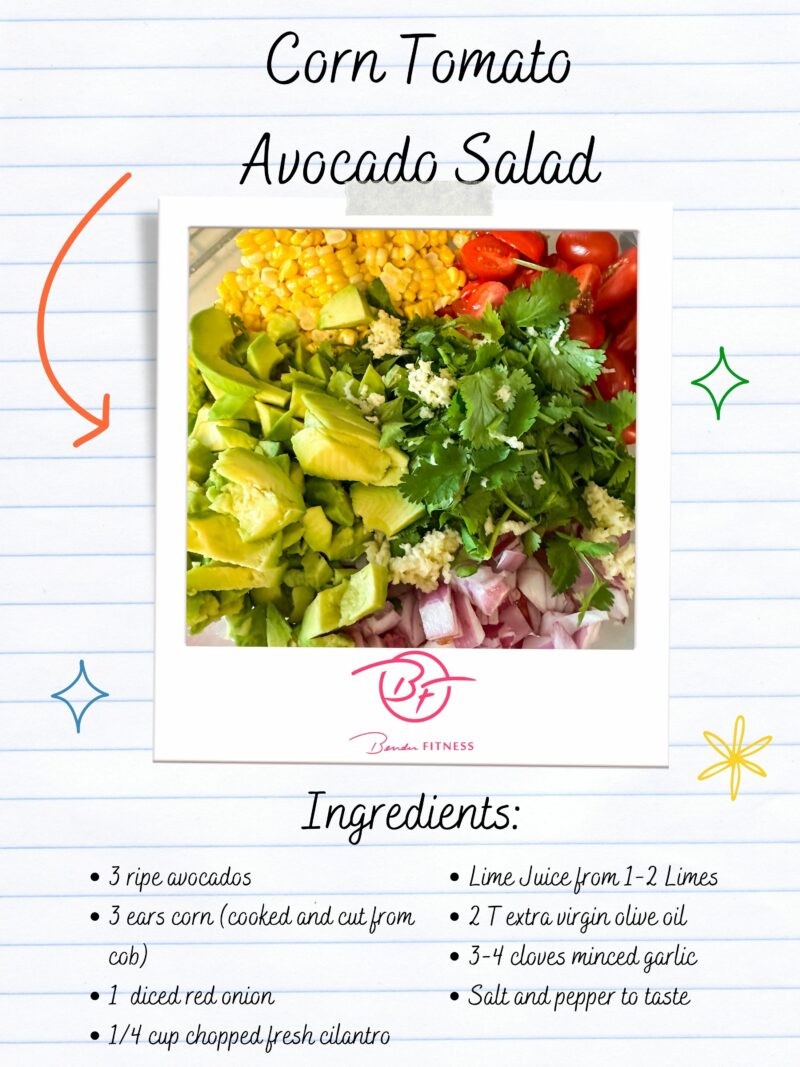
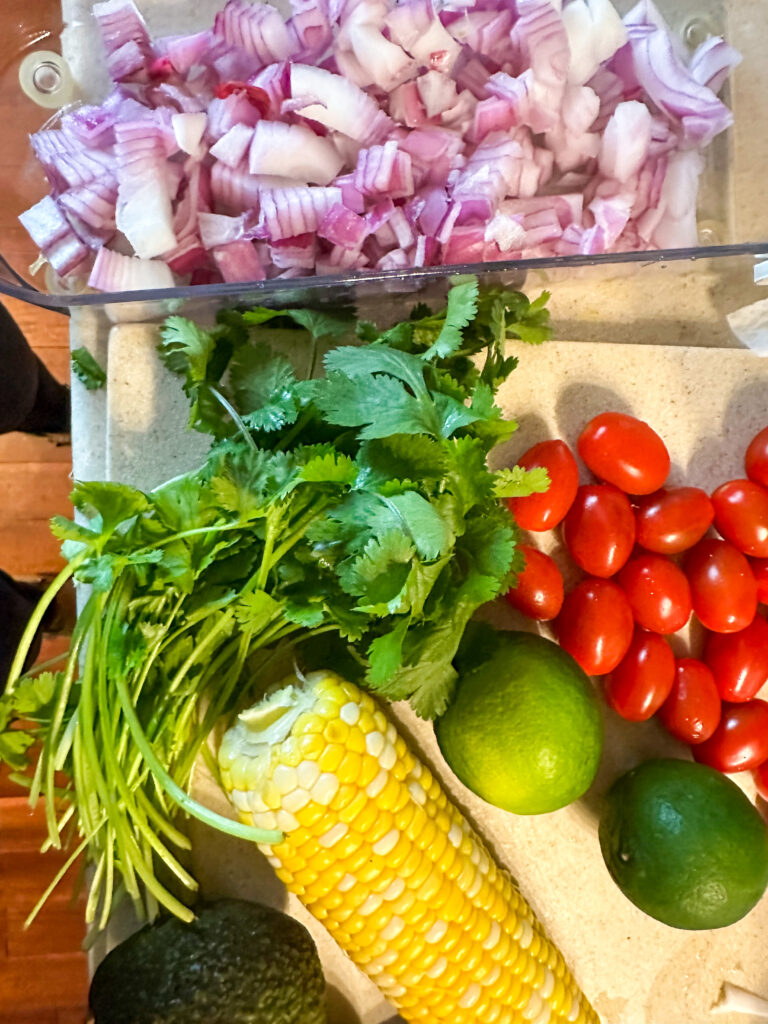
I have a delicious and simple recipe to share with you today! This Corn Tomato Avocado Salad is one of the best, simple party food recipes I have made in recent memory. It was a huge hit with everyone!
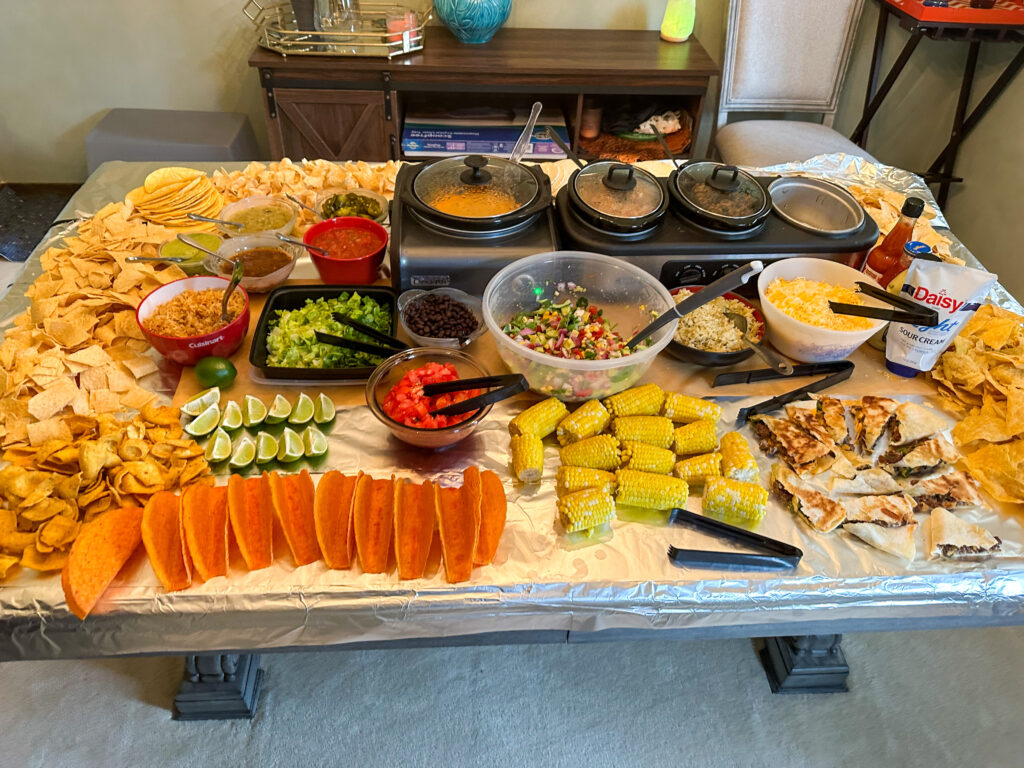
We celebrated my mom’s birthday with a taco table. It was great, because everyone was able to customize their plate. So everyone, from the youngest child to the adults was able to have food that they enjoyed.
There was pulled chicken, ground meat and pork, as well as a variety of toppings. The great thing about this salad, is that it’s fantastic on its own, as a side, over a salad or on top of a taco. It was so popular that there was none left at the end of the party.
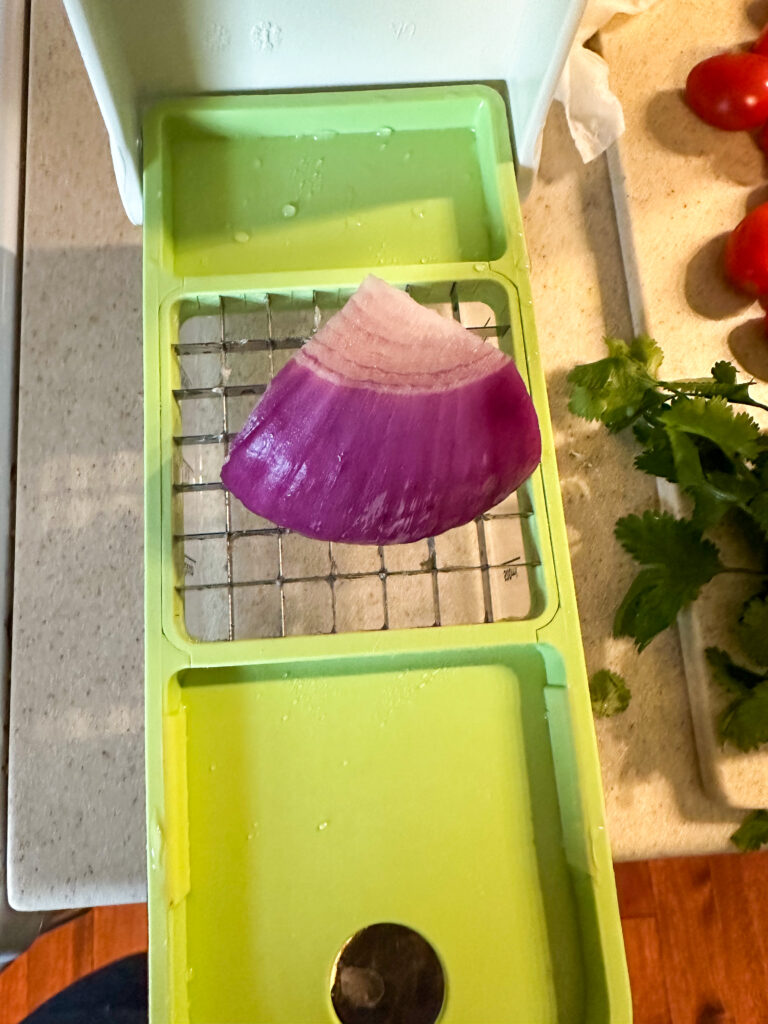
I kept things simple and used my Vidalia Onion Chopper. I often forget how handy this little kitchen gadget is, but it made the chopping go so quickly and my eyes didn’t burn at all. It was so much quicker and less messy than chopping everything by hand.
I used fresh corn for this, but you can substitute frozen corn if you are making this out of season, or are in a hurry. If you are using fresh corn, you just slice it from the cob when it’s done cooking. Wait for it to cool down before shucking the corn, so you don’t burn yourself!
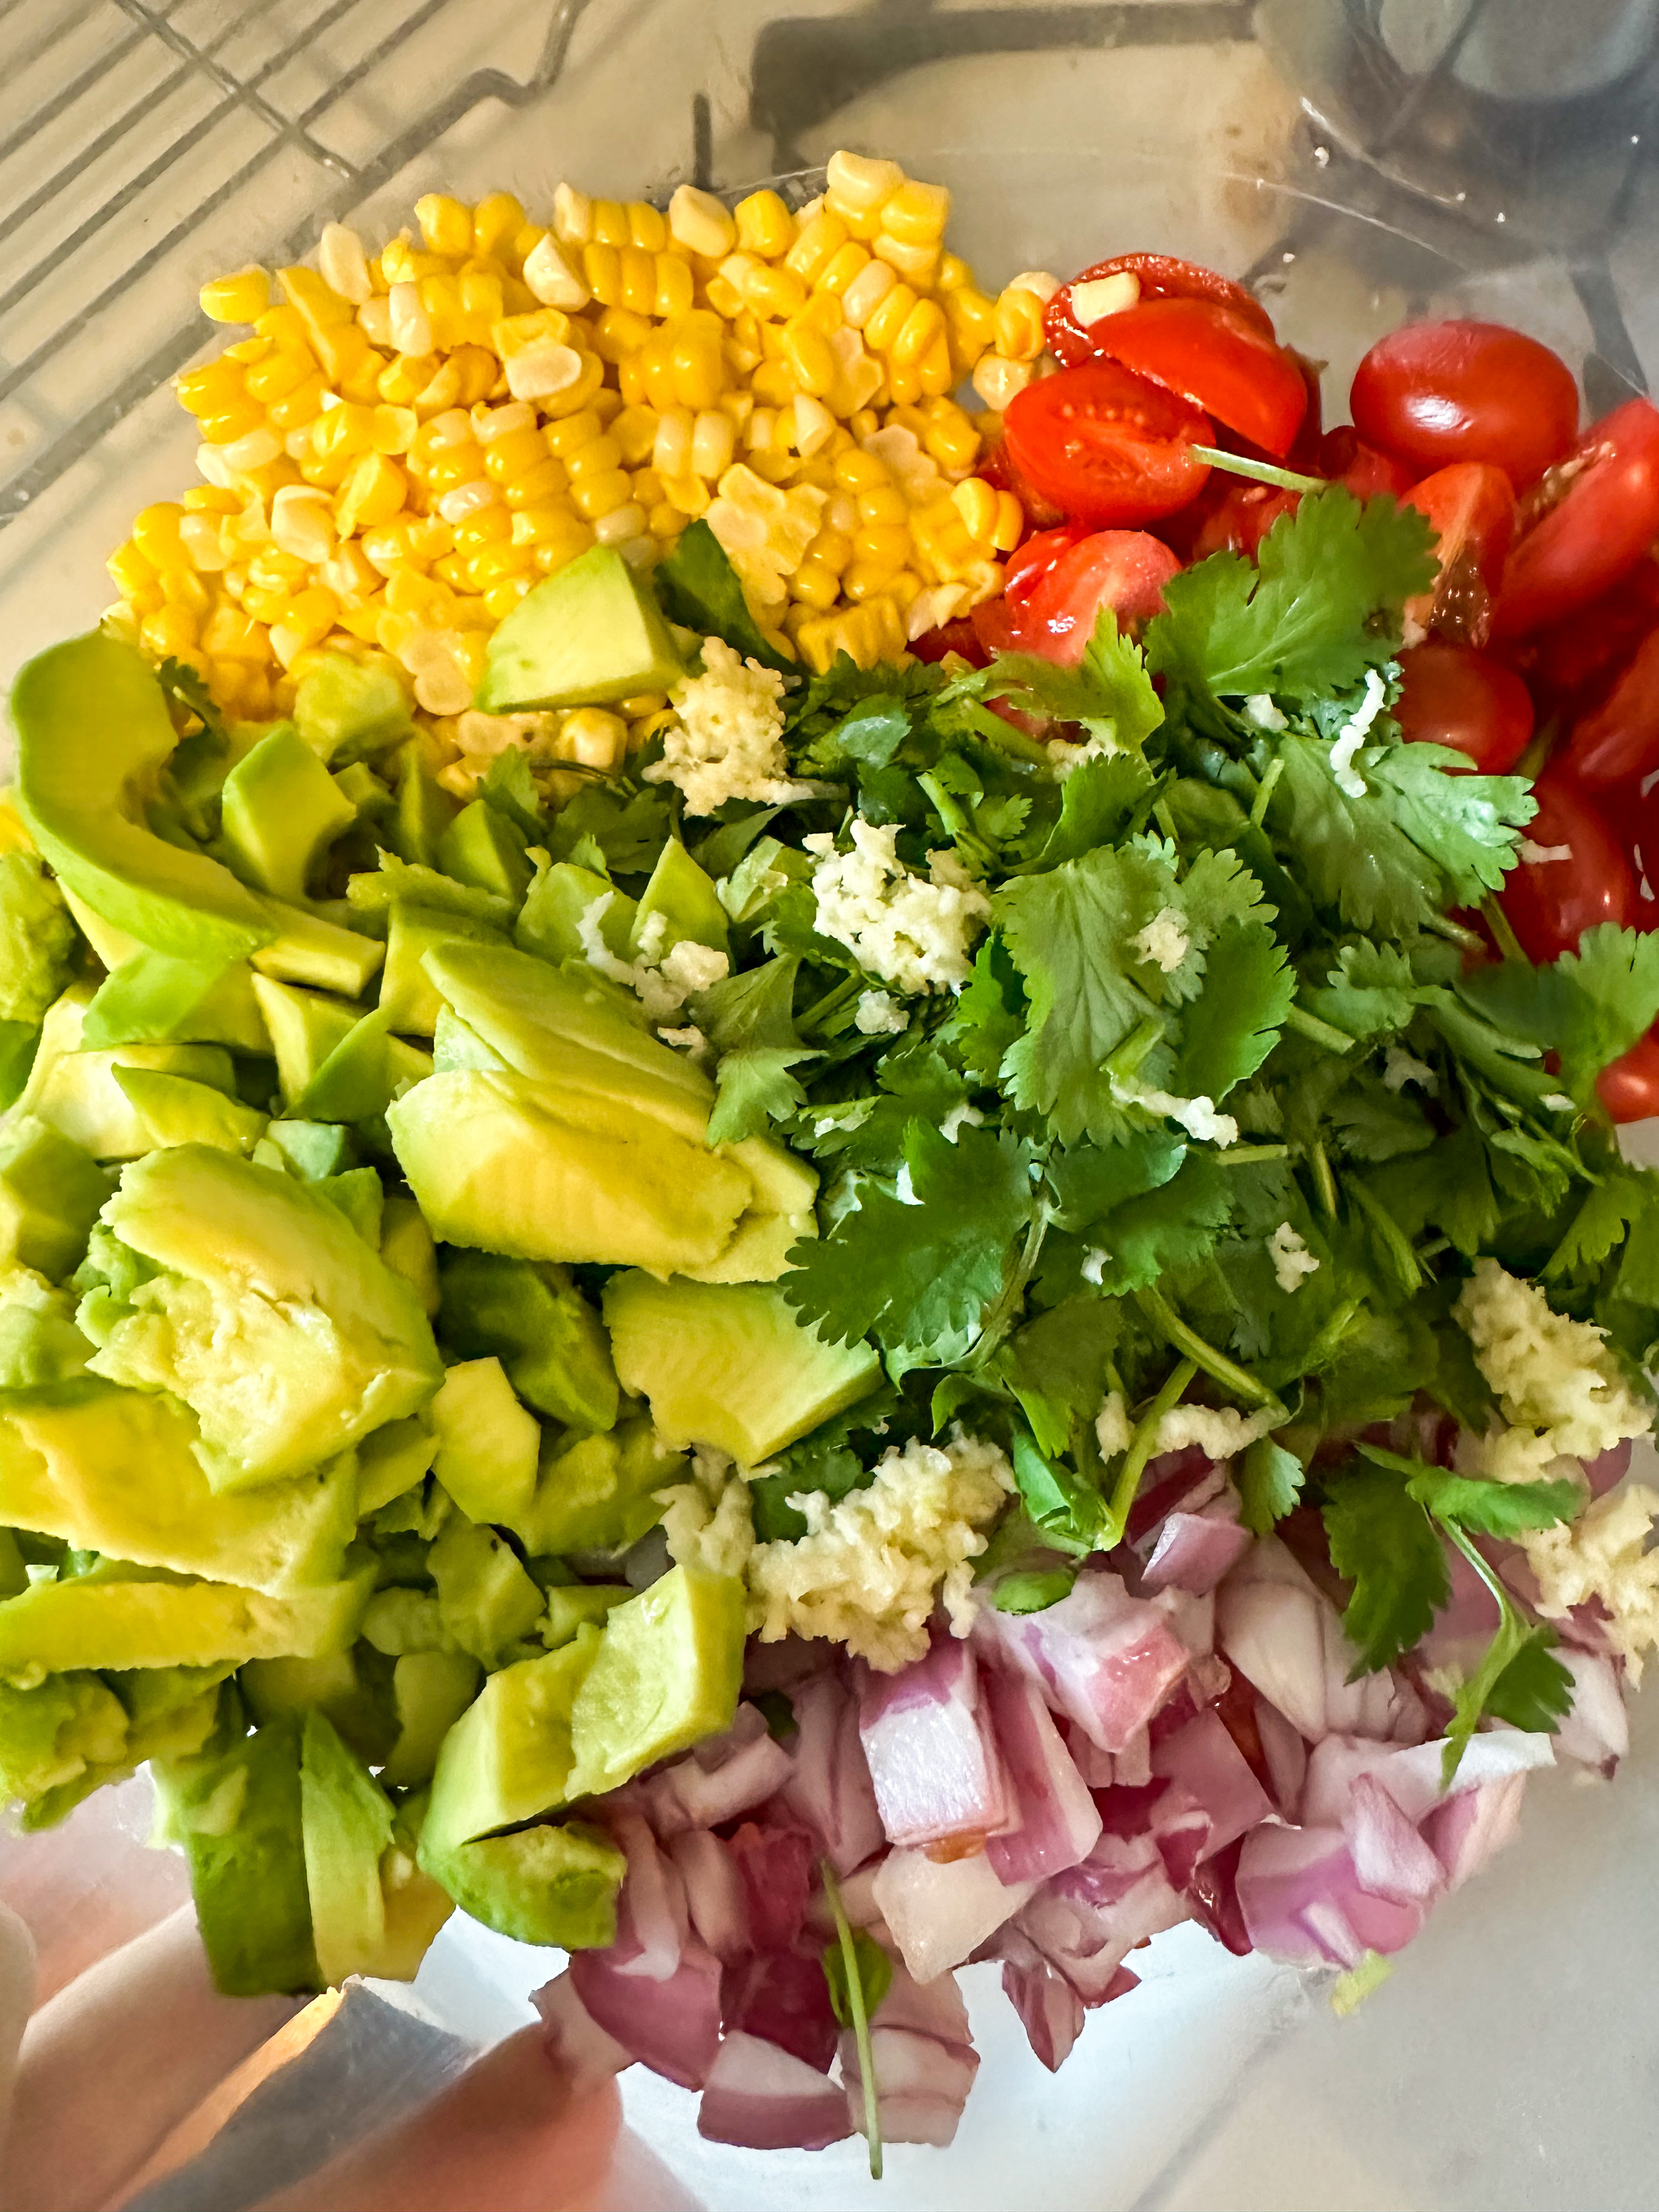
You can customize this recipe, by adding or removing ingredients. I love the colorful combination of the ingredients. It looks so pretty.
I hope you enjoy today’s recipe. If you make it please tag me in your social media photos and let me know any modifications you made to the recipe. I love to see the little tweaks that people do to personalize recipes. Don’t be afraid to make it your own!
I like to change things up and modify recipes frequently. In my workouts and my food, I’m a fan of variety.
Enjoy! You can find more of my Recipes HERE. Keep an eye out, because I have a new Core Workout headed your way soon!
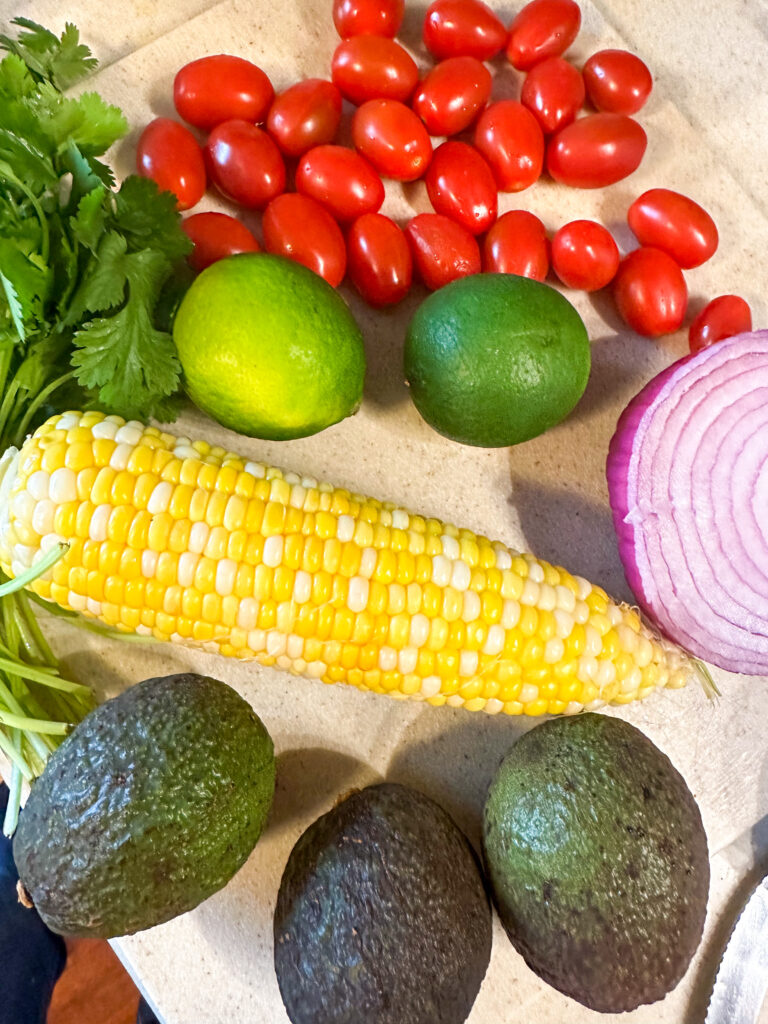
Aprox. 1 lb Cherry Tomatoes (quartered or chopped)
3 Ears of Corn, Cooked and cut off the cob (you can substitute frozen corn)
3 Avocados, Peeled, Pitted and Sliced
1 Red Onion (chopped or thinly sliced)
1/4 Cup Cilantro (chopped)
Lime Juice from 1-2 Limes
2 Tablespoons Extra Virgin Olive Oil
3-4 gloves of Minced Garlic
3/4 teaspoon Salt
Fresh Ground Black Pepper to Taste
Directions
Bake corn in the oven for 30 minutes at 350. (I left the corn in the husk and baked directly on middle the oven rack). Allow to cool and husk corn, before slicing it from the cob.
Put tomatoes, corn, avocados, onion and cilantro in a bowl.
Top with lime juice, olive oil, minced garlic, salt and pepper.
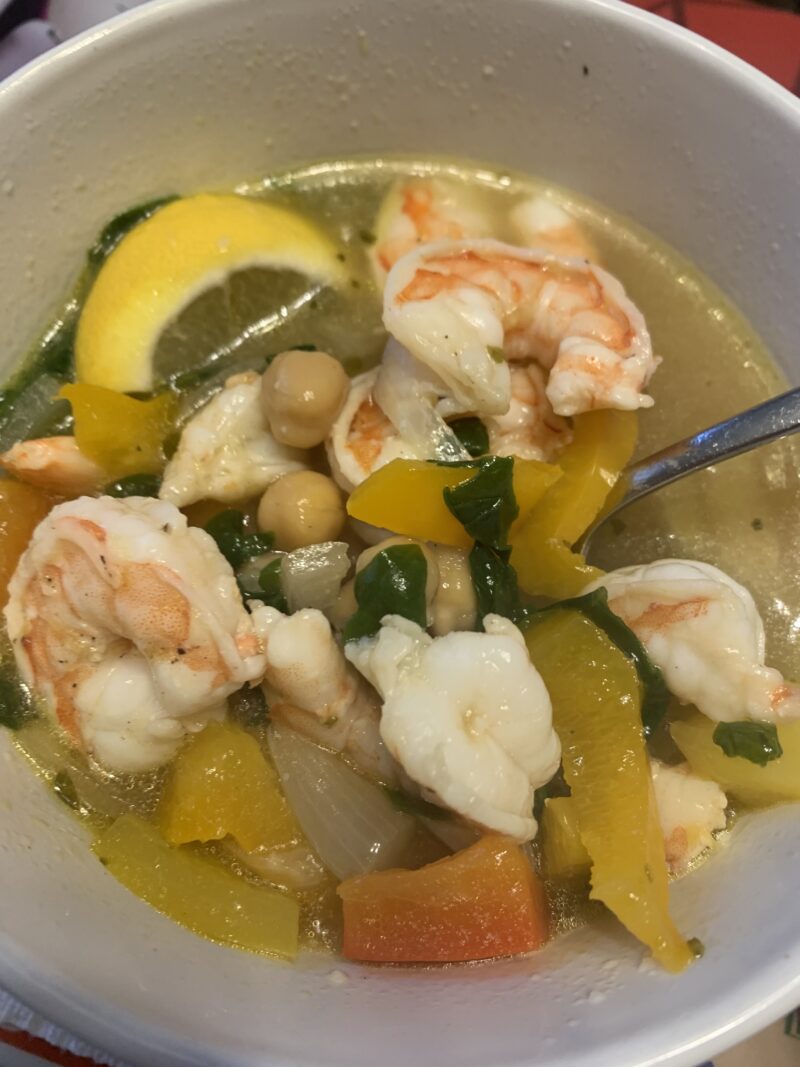
If you love soup, shrimp and vegetables you are in for a treat! This recipe is so delicious that I’m drooling a little bit just thinking about it. It was a hit with the entire family, and both kids requested second helpings.
Ironically, I came up with this recipe because I was very behind on grocery shopping and needed to work with whatever I had left in the fridge and cabinets. So I got creative with the foods I had on hand. If you aren’t a fan of shrimp you can substitute chicken or another protein of choice. I’m looking forward to making this recipe again. It was quick, healthy, simple to make and mouth watering-ly delicious.
Ingredients:
Lemon Pepper Shrimp Vegetable Soup
Broth -12 cups of Chicken Broth
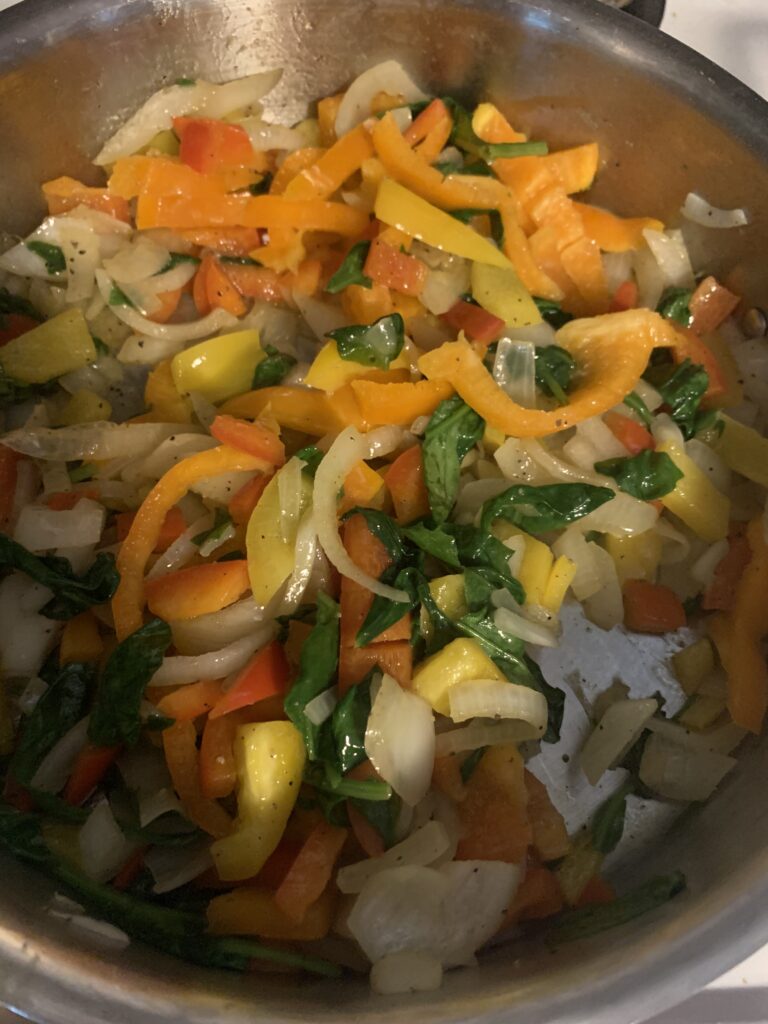
3 Bell Peppers sliced – I used red, orange and yellow
2 onions sliced
Fresh Baby Spinach chopped – approximately four handfuls
1 can chick peas rinsed
Large raw shrimp (peeled)
1 lemon, zested and sliced
Garlic to taste
Lemon pepper seasoning
Salt
Pepper
Oregano
Optional: sprinkle with Parmesan cheese when serving
The Recipe:
Step 1: In a large soup pot, add extra virgin olive oil and sauté minced garlic, onions, chickpeas (also called garbanzo beans) and peppers until soft. Add chopped spinach, oregano, salt and lemon pepper seasoning to taste.Lots of delicious and colorful vegetables.
Step 2: When Vegetables are cooked add broth into the pot. Warm broth and vegetables over medium heat.
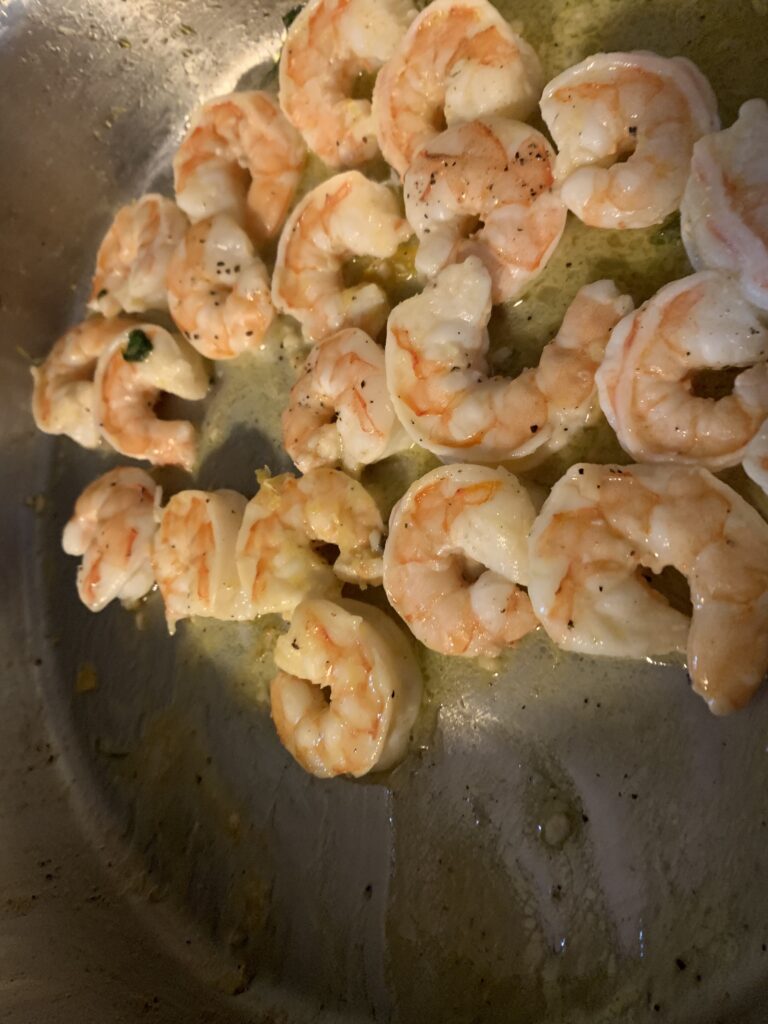
Lemon Pepper Shrimp with Lemon Zest cooking in Extra Virgin Olive Oil
Step 3: In a separate pan, over medium heat, cook peeled shrimp in extra virgin olive oil, garlic and zest of one lemon. (*For extra flavor you can add a pat of butter, but this is optional).
Do not overcook shrimp. You can add lemon pepper seasoning for extra flavor if desired.
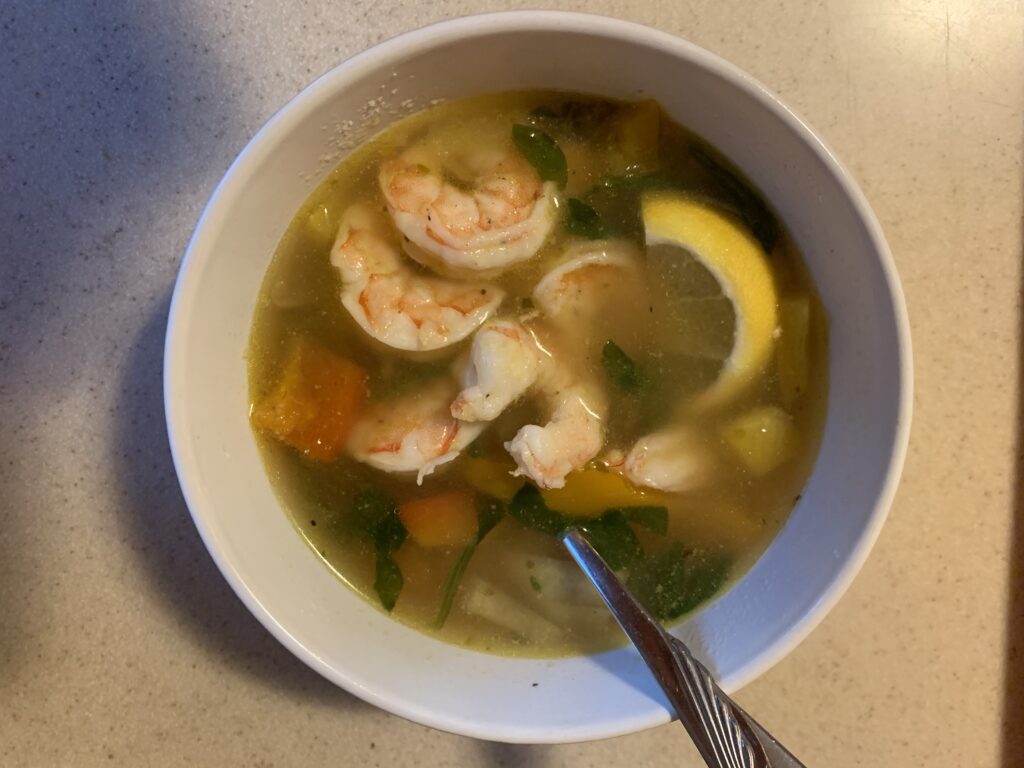
Step 4: When the shrimp is cooked and the broth is heated your meal is ready to serve! Put everything together in a bowl. Add a slice of freshly squeezed lemon for extra flavor.
Optional: Top with some fresh Parmesan cheese when you serve. You can also add cooked rice if you want a denser soup.
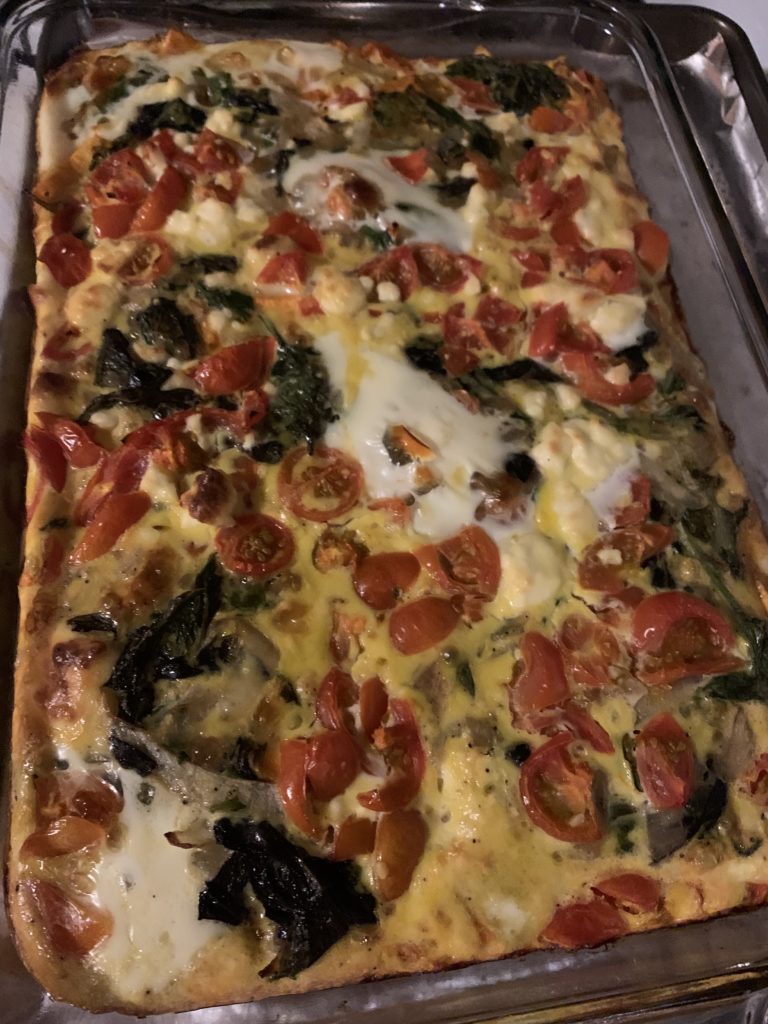
I love simple recipes that are loaded with nutrients. This delicious frittata delivers on all counts. Plus, it’s easily customizable. You can add or change vegetables to suit your palette and the taste buds of whomever you are dining with.
Bonus, this can be stored in the fridge for three days, so you can cook up a big serving and enjoy it for several meals. I love when nutritious and delicious meals can be prepped ahead of time. It’s so easy to make healthy choices when it’s already prepped and ready to go.
The Veggies
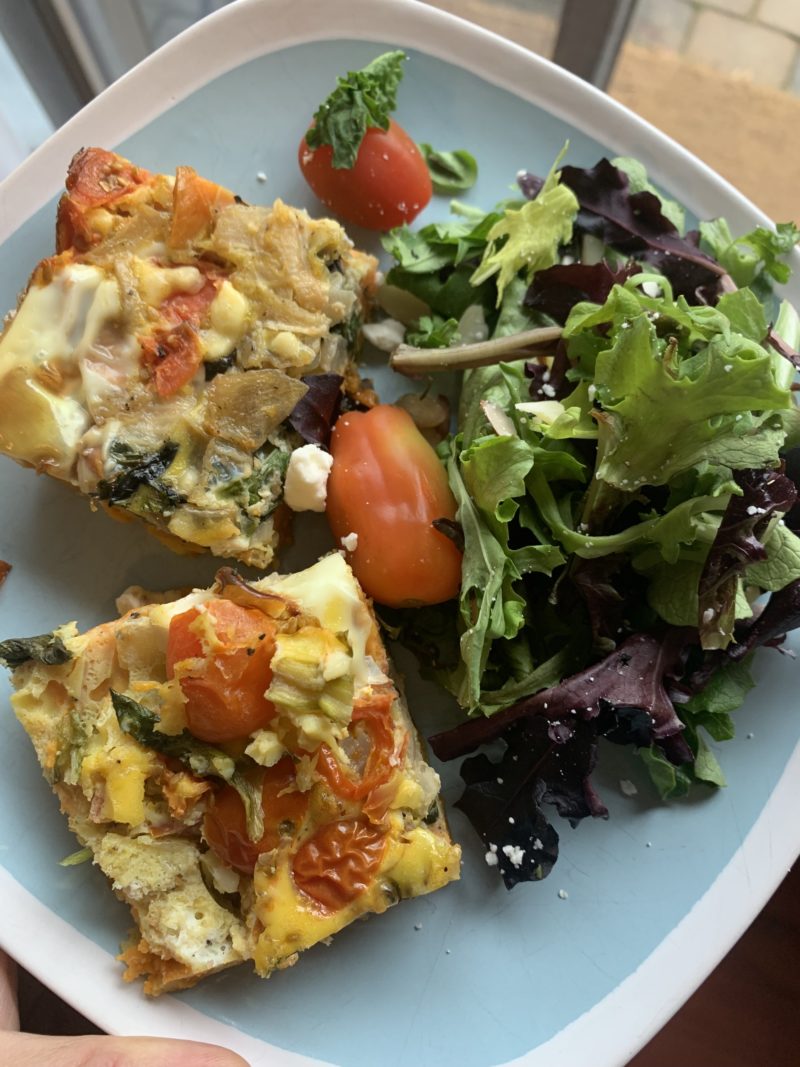
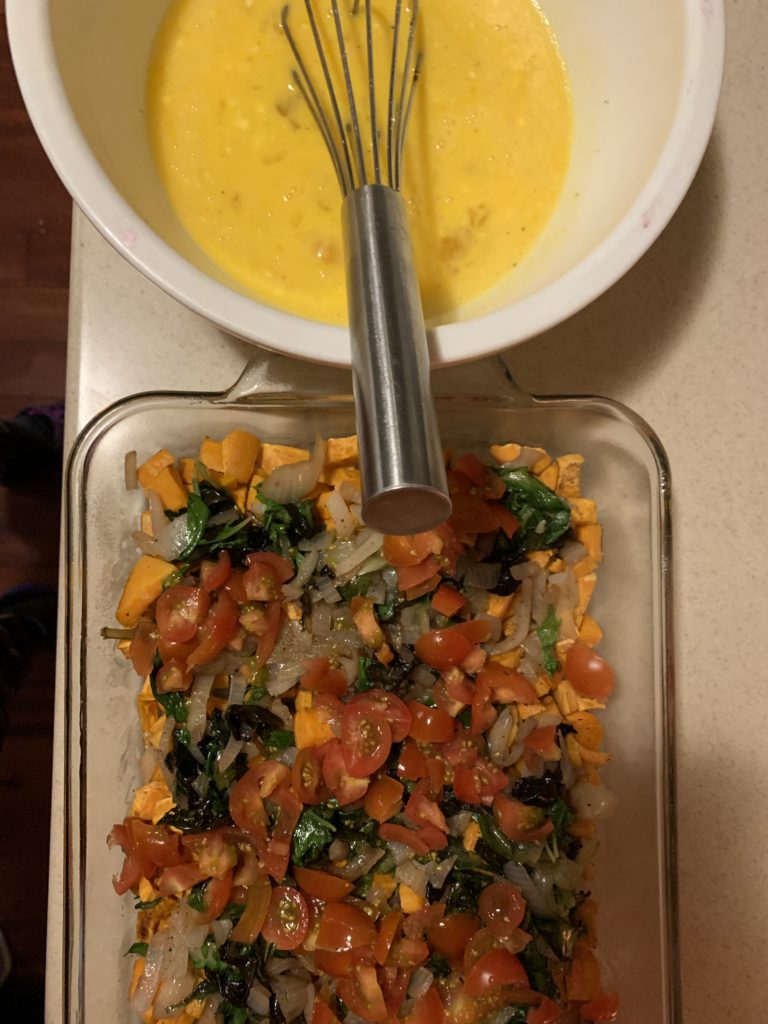
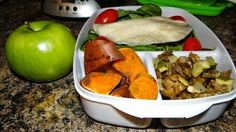
The veggies I chose for today’s frittata: Sweet Potatoes, Field Greens, Onions and Sliced Cherry Tomatoes. I like to use colorful vegetables in my meals. First of all, it’s visually satisfying. I’m not a master of plated food photos. There are some people who have refined plating food into an amazing visual art. More importantly, a variety of natural colors in your meals is a good indicator that you are getting a range of nutrients.
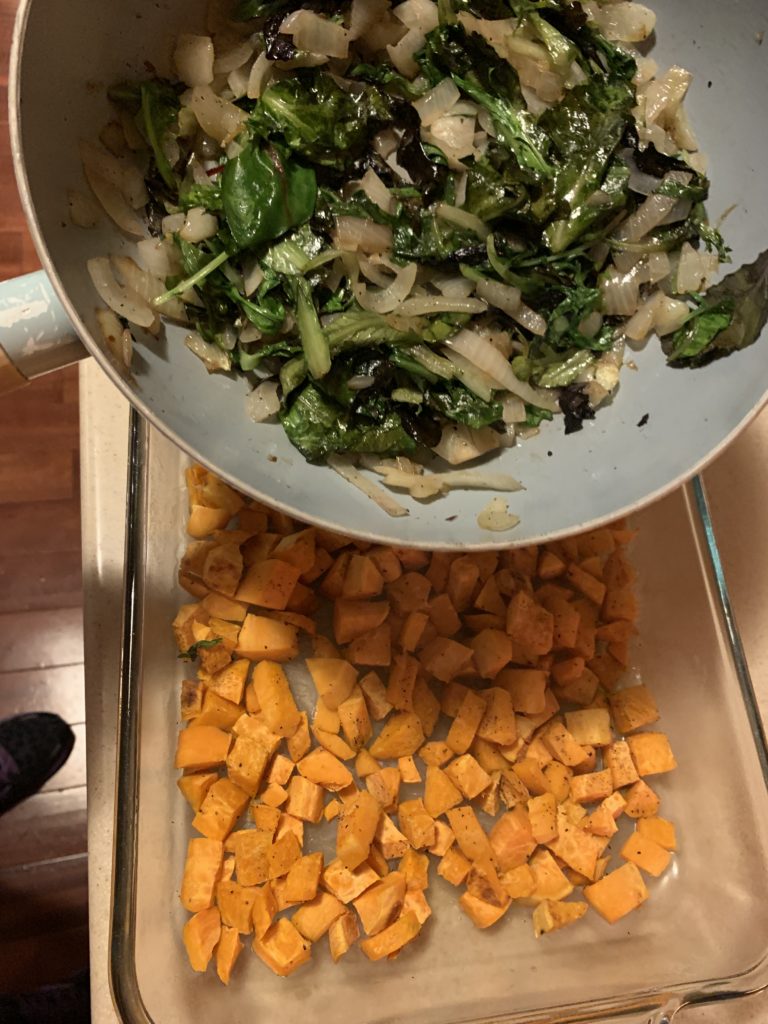
For this meal I roasted the sweet potatoes in the oven for 25-minutes, and sautéed the onions and greens before layering everything together and baking it.
I prefer to make this in a large baking dish so we have plenty of leftovers. My whole family loves this meal so a smaller dish goes to quickly. You can cut the recipe in half for a smaller portion. I normally store it in the fridge in an airtight container for three days, but it can also be frozen if you want it to last a little bit longer.
Sometimes I add smoked salmon or another protein of choice to this recipe. I love how versatile it is. If you switch things up and make this your own, please share your recommendations in the comments below.
The Recipe
Ingredients
-12 Eggs
-Sweet Potatoes-Peeled and diced (Aprox. 1.5 pounds)
-2 medium Onions
-Tablespoon minced Garlic
-Extra Virgin Olive Oil (1/2-1 Tablespoon)
-Field Greens, Kale or Spinach
-Tomatoes (sliced or diced)
-Feta (you can omit this or substitute Parmesan cheese)- I use aprox. 3-6 ounces of cheese.
-Salt and Pepper to Taste
Step 1:
Pre-heat oven to 350-degrees Fahrenheit.
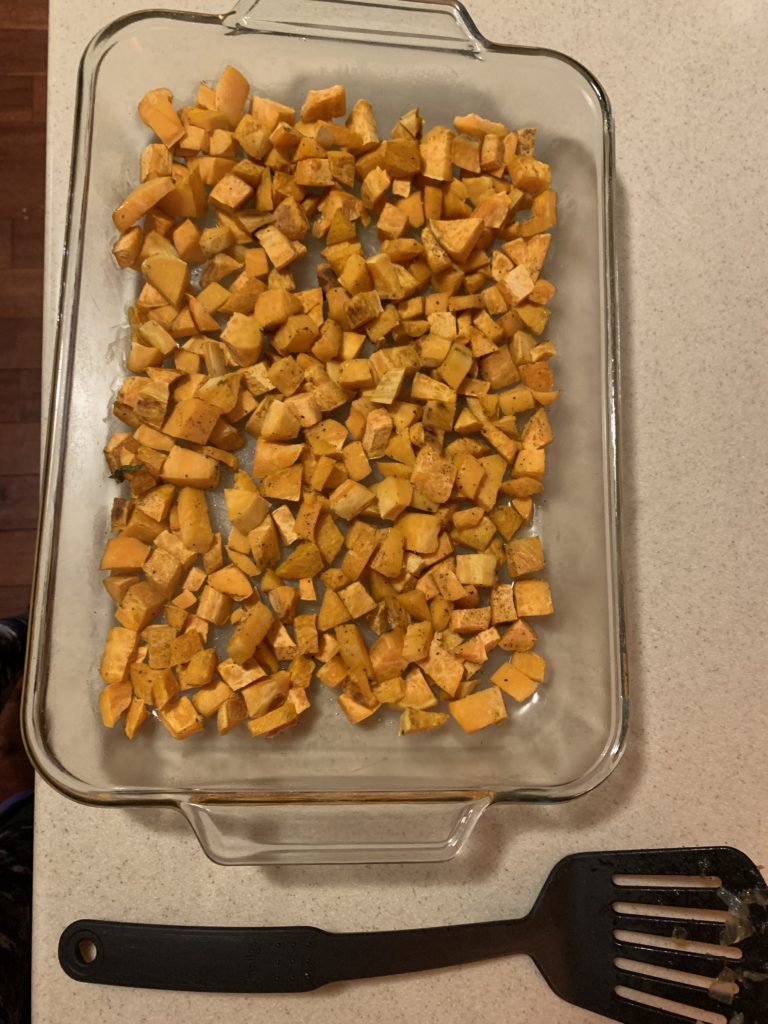
Peel and dice sweet potatoes and place them on a baking tray in a single layer. Top with salt and pepper. Bake 25-minutes or until tender.
After baking is completed transfer the sweet potatoes into a baking dish and layer across the bottom of the dish. Leave the oven on at 350-degrees.
Step 2:
While the sweet potatoes are in the oven sauté the onions and minced garlic in extra virgin olive oil. When the onions become translucent throw your greens of choice into the pan and continue to sauté until the greens are wilted.
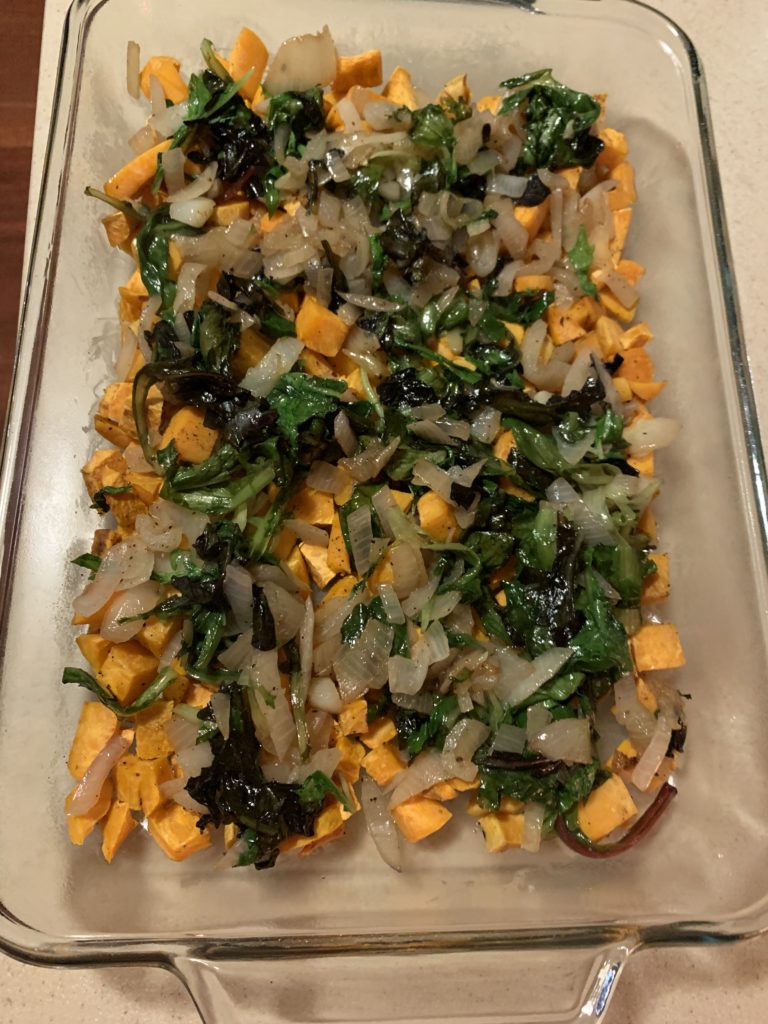
When that is complete, add the greens into the baking dish and layer over the sweet potatoes.
Top the layer of greens with your tomato slices. This step is pictured in the photo below, during step 3.
Step 3:
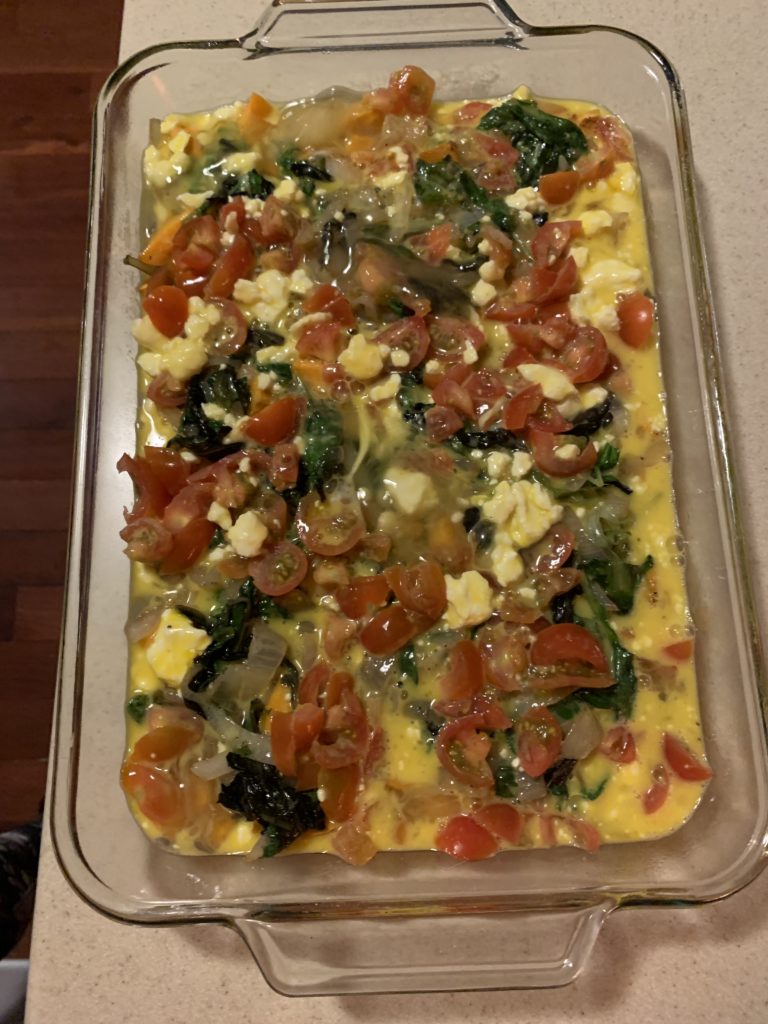
In a large bowl whisk together eggs and cheese. When they are combined you will pour this mixture over the vegetables.
Step 4:
Place the dish in the oven. Bake for 35-45 minutes. I always check the dish at 35 minutes, but it usually takes the full 45-minutes to fully cook.
Step 5:
Remove from the oven and enjoy! If you want more greens serve with a side salad. It’s also delicious with some toast or served with avocado slices.
Please welcome Rose Bruno Bailey as a BenderFitness recipe contributor. Rose is Vegan and is looking forward to sharing some of her favorite veggie based recipes with us.
Rose’s Recipe Inspiration
Tomorrow is Taco Tuesday, and everyone loves Taco Tuesday. I wasn’t a taco fan until recently, and I didn’t understand everyone’s fascination with tacos.
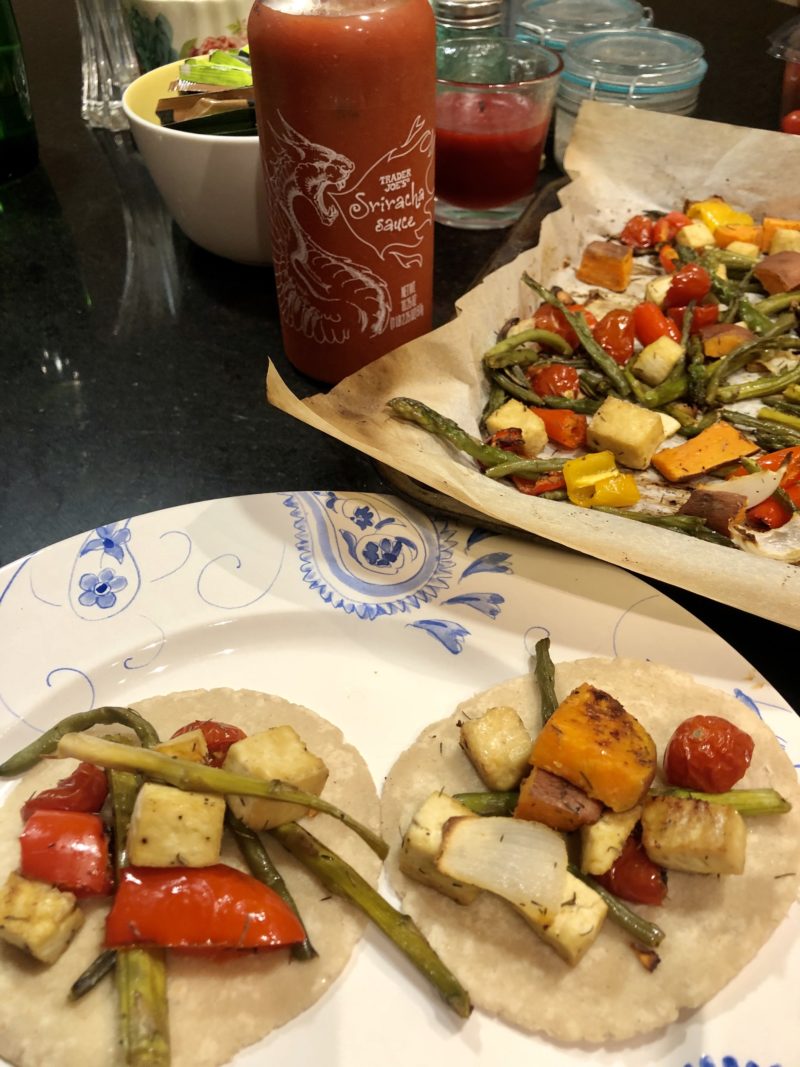
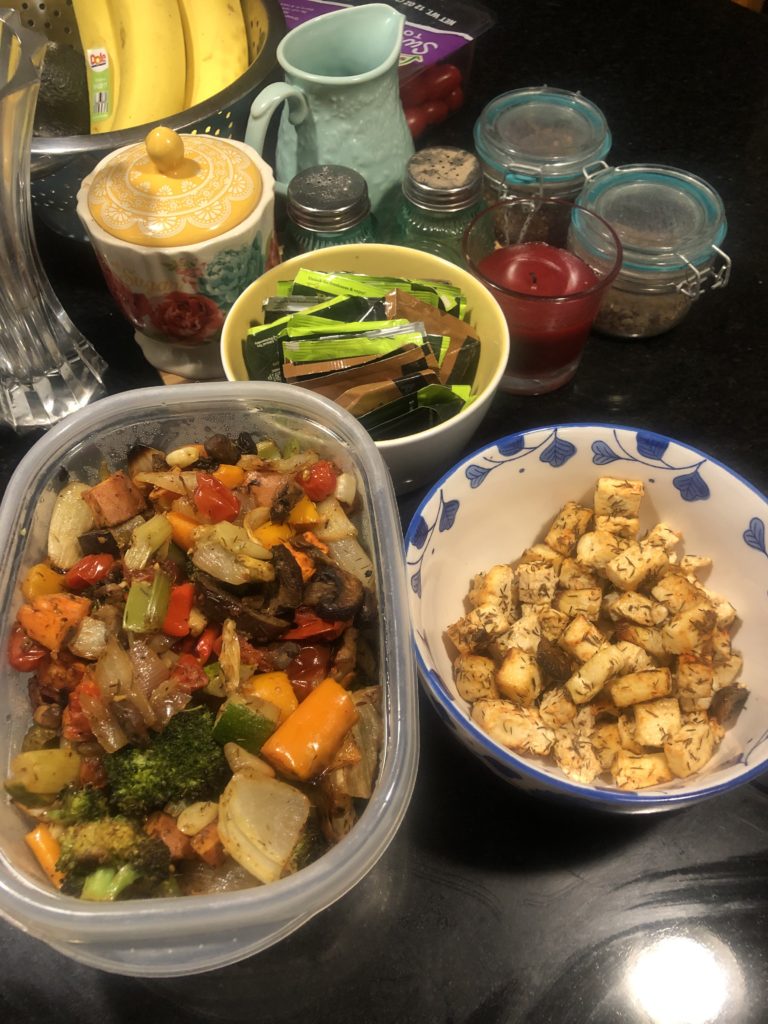
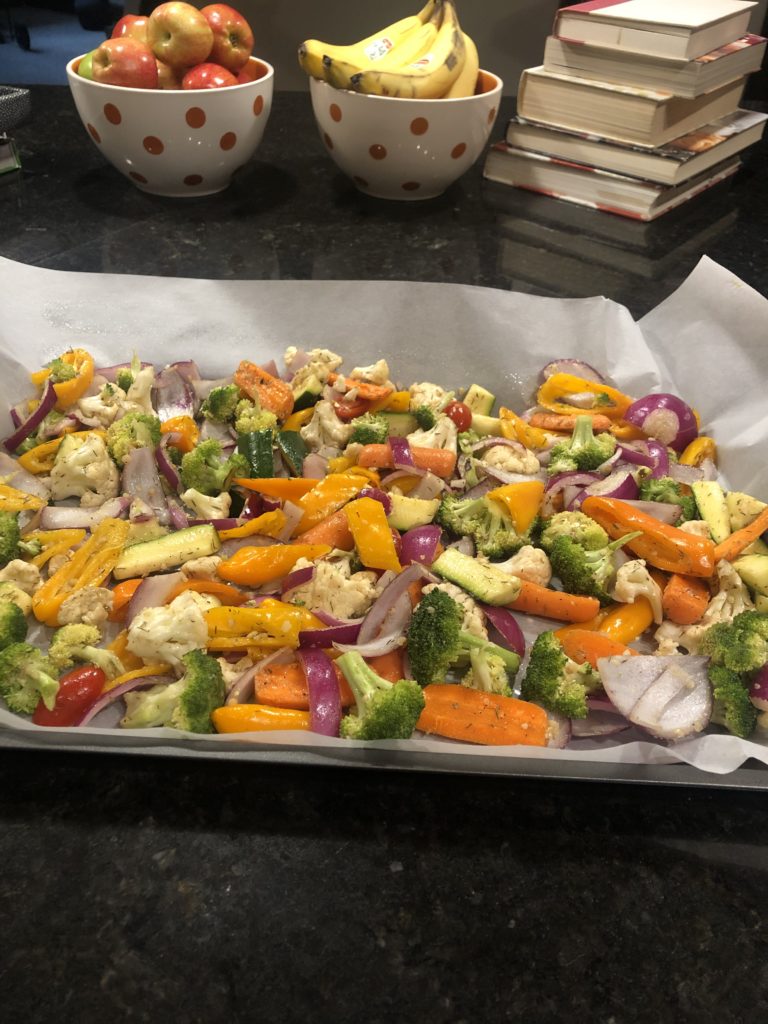
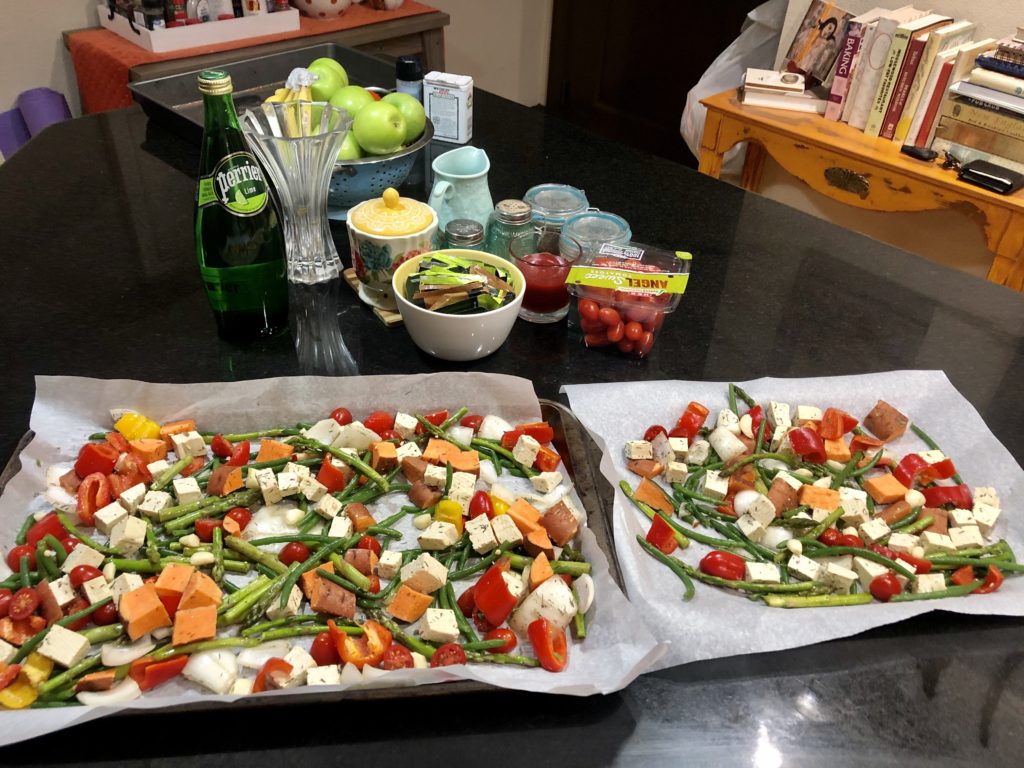
Then one day I started experimenting in the kitchen, looking for ways to meal prep my favorite vegan foods in the oven. I roasted a big pan of veggies, sweet potatoes, and a separate pan of tofu. No veggie was off limits, and I especially love roasting purple cabbage.
I decided tacos were a good idea, and with a little help from sriracha sauce and avocado I finally understood the love affair with tacos.
I now love tacos too, consider me late to the taco party; and what an easy and healthy way to eat your veggies.
You will need:
Two big sheet pans.
Parchment Paper Extra Virgin Olive Oil Dried thyme Salt Black Pepper Cayenne Pepper Cumin
Vegetables: Any veggies will do, these are my favorites. Diced zucchini Diced Sweet Potatoes Diced asparagus Chopped Red cabbage Cherry tomatoes halved Green peppers quartered Red peppers quartered Yellow peppers quartered Cauliflower florets Extra firm tofu, water squeezed out and cut in cubes Warmed Tortillas of Your choice Avocado *Optional Vegan sour cream
Pre-heat oven to 400 1. In a large bowl combine veggies in two tablespoons olive oil. Toss tofu separately in another bowl.
2. Lightly season both bowls with salt, pepper, a few dashes of thyme, cayenne pepper, and cumin to taste. *You could also use taco seasoning.
3. Arrange vegetables and tofu on parchment paper. *You may need to make two batches. Roast longer cook time veggies like cauliflower, sweet potato together with the tofu, and cook the other vegetables separate. You will have two pans to roast.
Roast for 20- 30 minutes, checking often. I like my veggies cooked well and my tofu crispy. Warm tortillas on a pan for a few seconds on each side.
Build your tacos, tacos are personal so get crazy and creative. I like the tofu and veggie mix with avocado, sriracha sauce and a dollop of vegan sour cream. My hubby loves chips and salsa as an accompaniment. My favorite sriracha sauce is Trader Joe’s. Taco Tuesday is now a thing for my hubby and I.
Please welcome Rose Bruno Bailey as a BenderFitness recipe contributor. Rose is Vegan and is looking forward to sharing some of her favorite veggie based recipes with us.
Rose’s Recipe Inspiration:
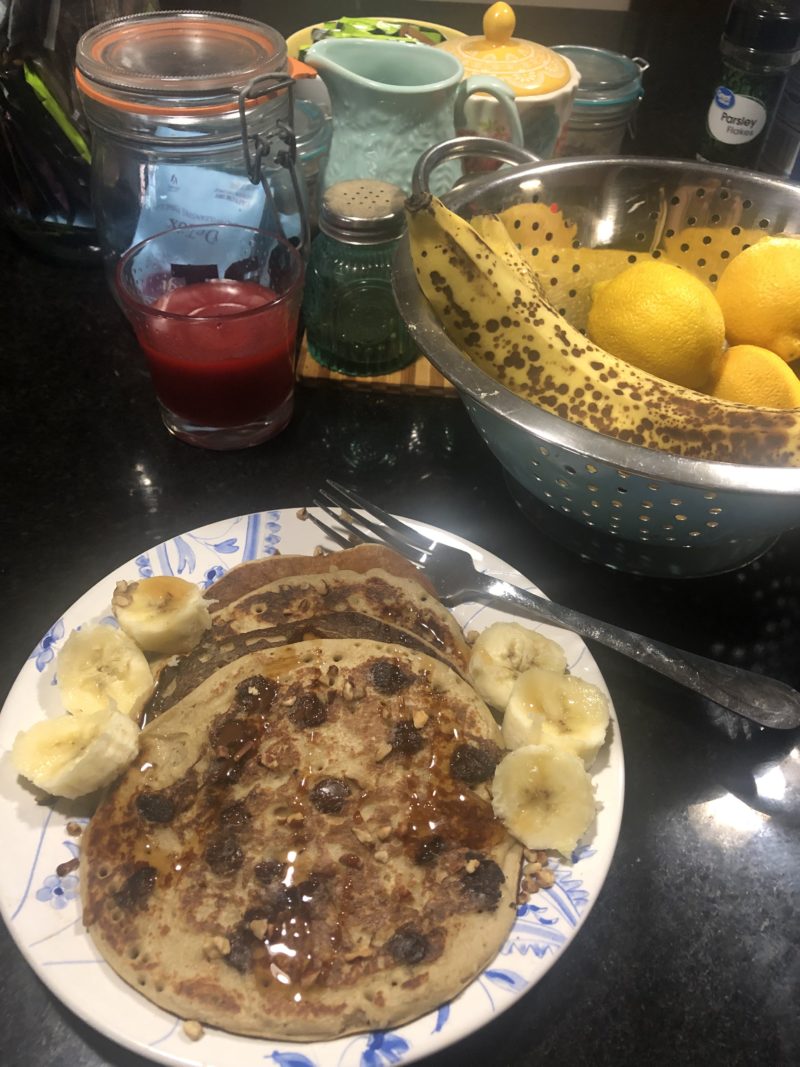
The pancakes in the photo above were delicious, but that’s not what we are cooking up today.
They were not vegan nor were they healthy, it was a treat I indulged in before I went vegan. I was living in West Hollywood, CA and everyone who visited wanted to have brunch at The Griddle Cafe on Sunset Blvd. The pancakes at the Griddle Cafe were fantastic but obnoxious, and definitely not healthy.
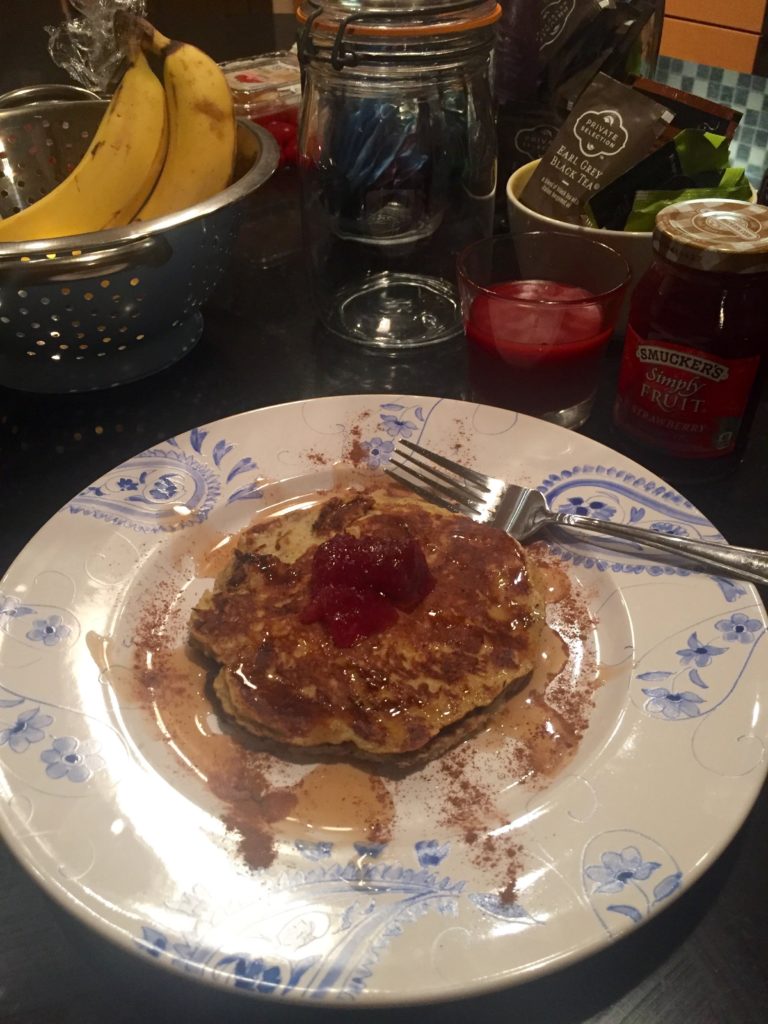
Instead we are making portioned controlled One Bowl Vegan Banana Pancakes that are healthy and with only a few ingredients, which makes them easy to prepare for your own vegan brunch.
Let’s make Monday brunch a thing to sweeten the beginning of the week.
*1/4-1/2 cup plant based milk ( I prefer Organic soy milk but any plant based milk is fine)
*1 cup oat flour ( you can make your own with regular oats and a blender)
Directions:
1. Mash bananas in a bowl with a fork.
2. Mix in oat flour and plant based milk. A fork or a whisk works fine.
3. Use a little coconut oil to heat pan. Scoop batter to make medium sized pancakes. Cook on each side over medium heat until the batter starts to bubble, than flip with a large spatula.
4. You can add other ingredients, vegan chocolate chips, berries, nuts, apples. Get creative.
5. Serve with a little all fruit jam or a drizzle of real maple syrup. Trader Joe’s has one that’s reasonably priced.
Happy Meatless Monday, enjoy your vegan pancakes and feel good that you are starting the brand new week with potassium filled nutrition.
Please welcome Rose Bruno Bailey as a BenderFitness recipe contributor. Rose is Vegan and is looking forward to sharing some of her favorite veggie based recipes with us.
Rose’s Recipe Inspiration:
My sister Frankie and I attended an earth day celebration when I was 24, and we ended up featured on the evening news. It was one of those moments that move you to your core. The vibration, the energy, we both felt it. Afterwards we went to a local diner and ordered grilled cheese sandwiches instead of our usual burgers, we decided after our Earth Day experience we wanted to be vegetarians.
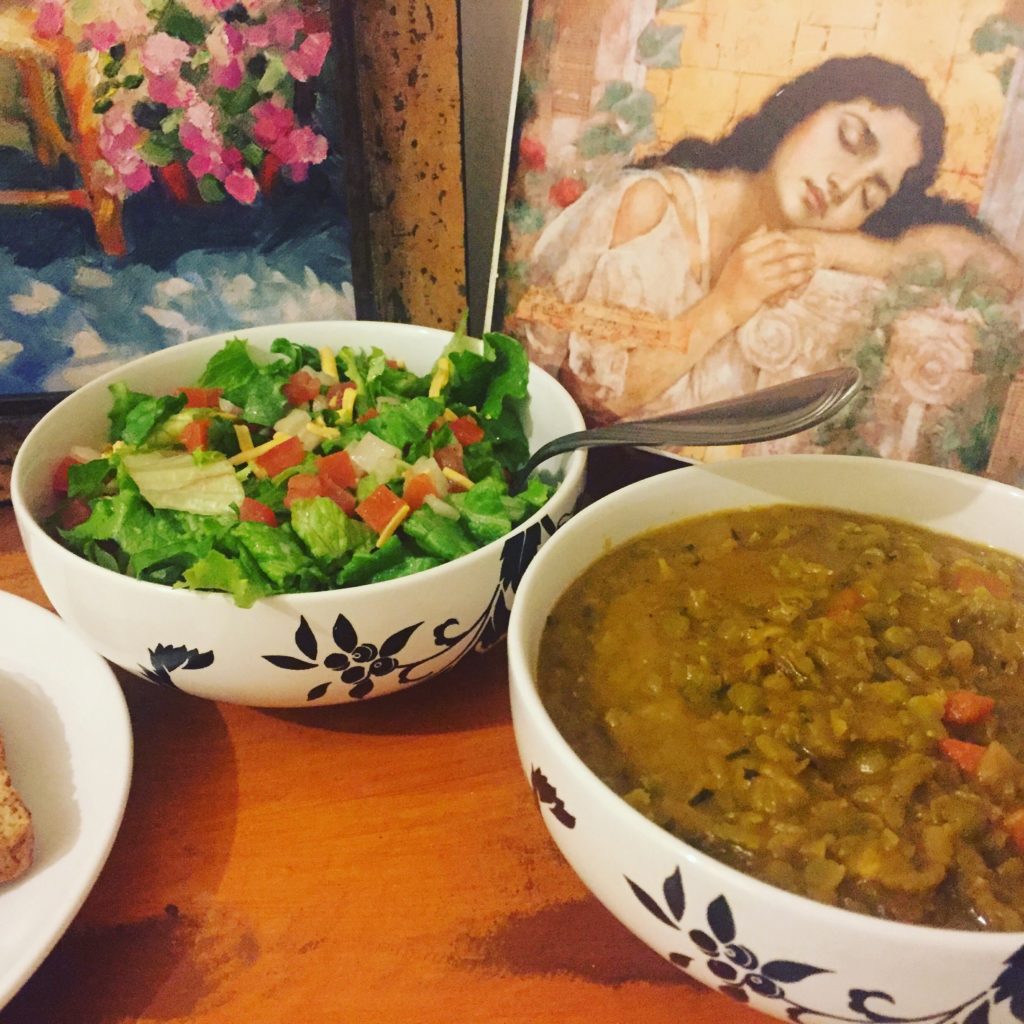
This recipe is also delicious with a side salad.
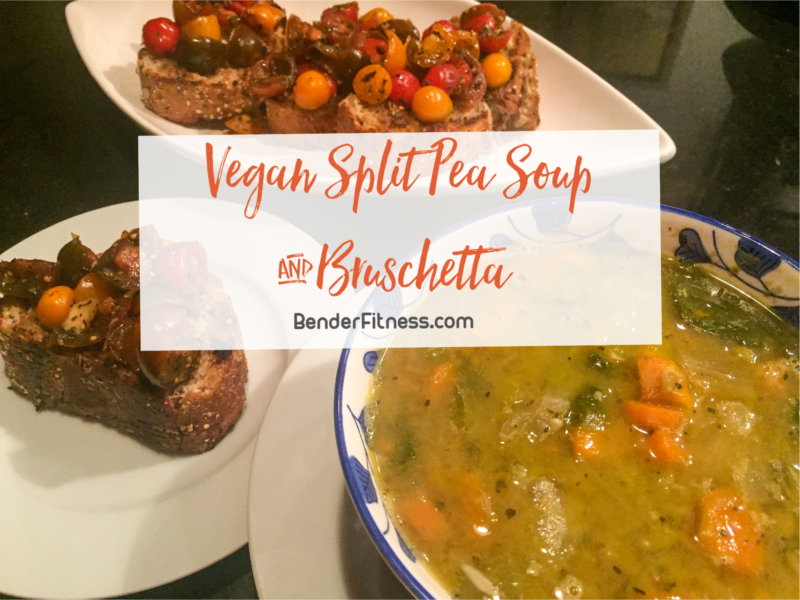
At first our Mother was like most Mothers, she didn’t understand vegetarianism and questioned what did we plan to eat. She was a fantastic cook and eventually she came around and got creative in the kitchen making vegetarian versions of her famous recipes. One of my favorites was her vegetarian split pea soup. Most people think ham is necessary in Split Pea Soup but it’s not needed. She made vegetarian comfort food and it was delicious.
Today, I’m vegan and I found my niche cooking vegan food, comfort food and healthy stand byes. One of my favorite creative endeavors is to transform my Mom’s recipes to vegan. Luckily the Split Pea Soup was already vegan so I had a head start. It’s a staple in my household, my husband James loves it and we even ate it when we hunkered down during Hurricane Harvey; it’s the perfect rainy day meal. So make a big pot of Mom Bruno’s Vegan Split Pea soup and be sure to share it with someone you love.
– 3 cartons of low sodium vegetable broth. I prefer Trader Joe’s for its rich flavor. I also like Imagine no chicken broth.
-1 bag( 16 oz) dried split peas
-Olive oil or vegetable broth
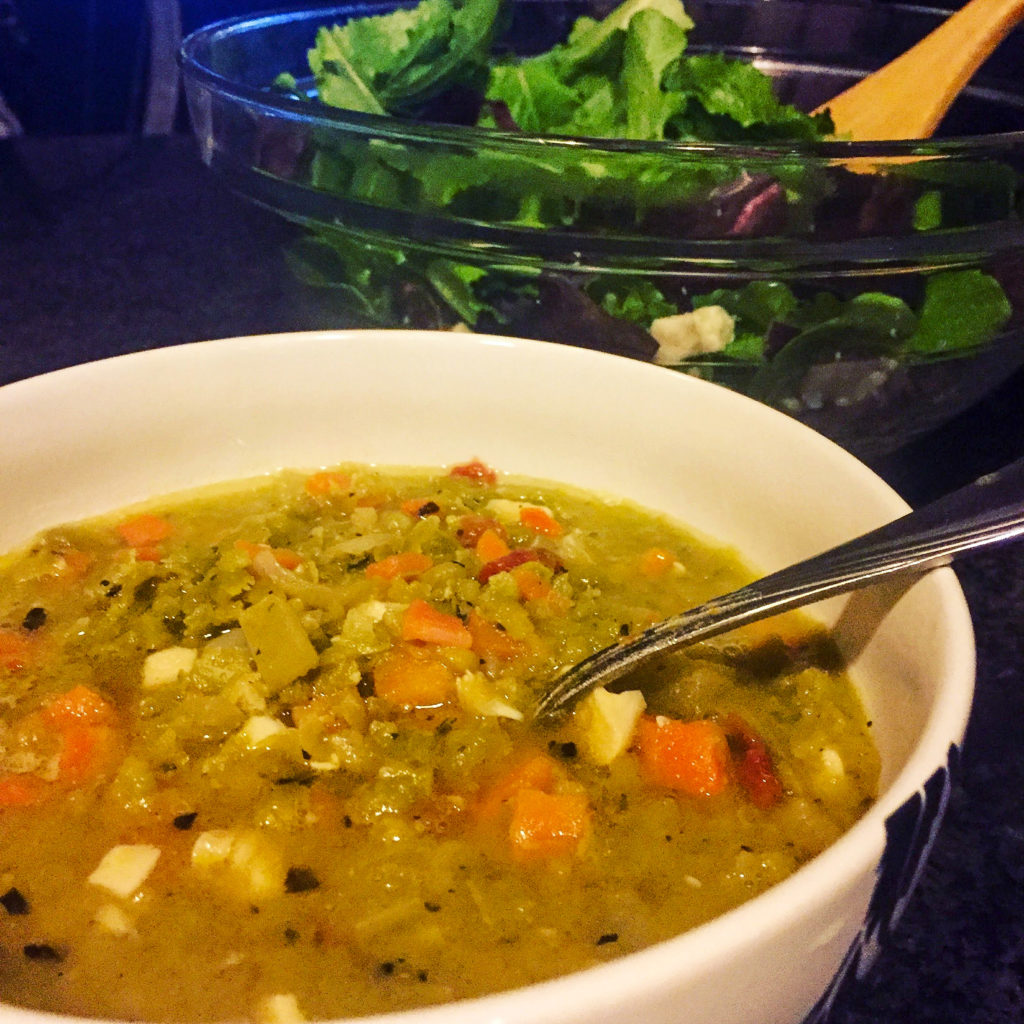
-Two cups of diced vegetables: Chopped carrots, Celery and Onion mix. (Trader Joe’s has mirepoix mix or you can chop your own.)
-Up to two cups of additional vegetables of choice: I use Kale
-Garlic cloves to taste, I use about 9 cloves of garlic
-Salt
-Ground Black Pepper
-Dried Basil
Directions:
Warm the extra virgin oil for a few seconds in a large pot. If you do not use oil you can sauté your vegetables in water, white wine or vegetable broth.
Add the Carrots, Onions and Celery and sauté for 4 -5 minutes and then add the garlic.
Continue to saute’ vegetables until translucent. I like my vegetables cooked thoroughly so I saute’ mine for at least five minutes.
Season the veggies with a bit of sea salt, a generous dose of ground pepper and basil.
You can add whatever vegetables you like. Sometimes I add kale to my soup.
After the veggies cook, add 2 cartons of vegetarian broth, the whole bag of split peas, and bring it to a boil.
Season it a bit more with salt, pepper and dried basil, and cover.
Bring the temperature to medium/ low and Simmer for 1 hour.
I start with two cartons of vegetable broth and add the third one if needed. For a thicker broth two cartons of broth is sufficient, but if you like a thinner consistency you can add more.
It is that easy.
Enjoy!
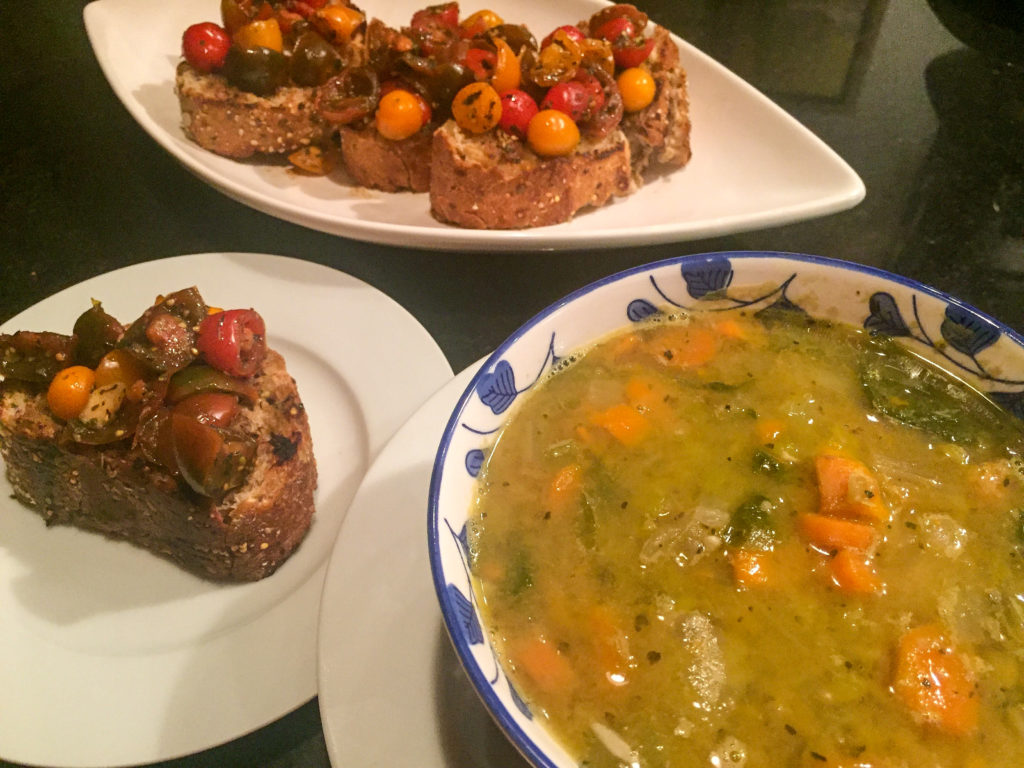
Bruschetta Recipe:
Ingredients:
-Whole Grain Bread
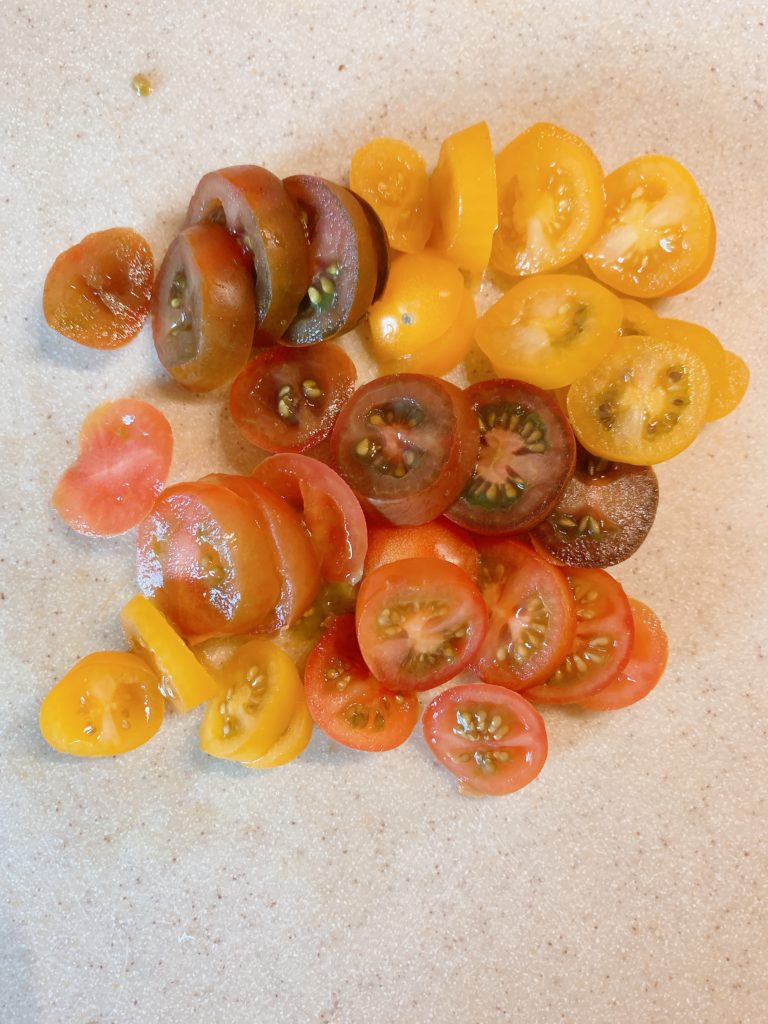
-Heirloom Grape Tomatoes
-Balsamic Vinegar
-Sea Salt
-Fresh Basil
-Extra Virgin Olive Oil
Warm your whole grain bread in the oven.
Chop up grape tomatoes and season with balsamic vinegar, sea salt, fresh basil and extra virgin olive oil.
A quick bruschetta topping for your crusty whole grain bread accompaniment.
This soup lasts only two days in my house, because my husband eats three bowls at a time.
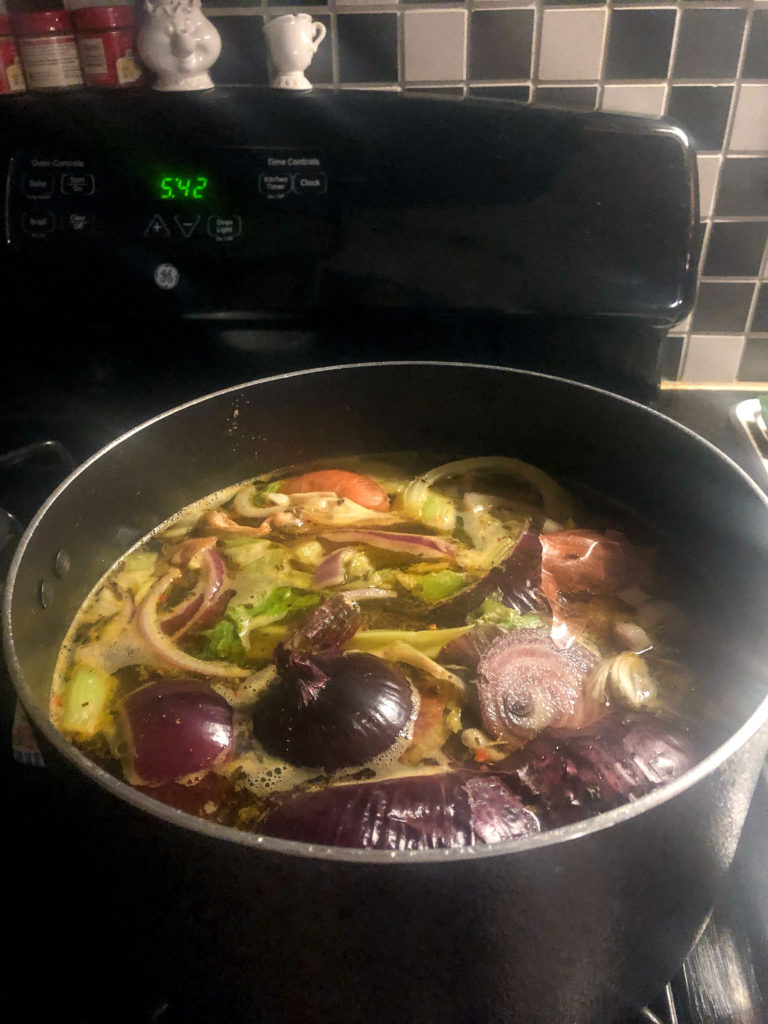
To Make Your Own Veggie Broth:
You can save scraps from vegetables and freeze them, and make your own homemade vegetable stock. I save scraps from onions, carrots, leeks, garlic, bay leaf. Put all your scraps in a pot and cover with water and bring to a boil, simmering on low for a few hours.
If you’ve been following BenderFitness for a while, you probably already know that I’m obsessed with soups and broth bowls. Not only do I love the flavor, and the ease of adding plenty of veggies into a nutrition dense meal. I also love the lower number of dishes needed to clean up.
Whether it’s a crockpot recipe, or a stovetop dish I love the ease of soup. Plus, as the seasons change and the days grow cooler it warms me up from the inside out. In the Autumn and Winter months I make soup at least once per week, and it keeps our family fed for several meals.
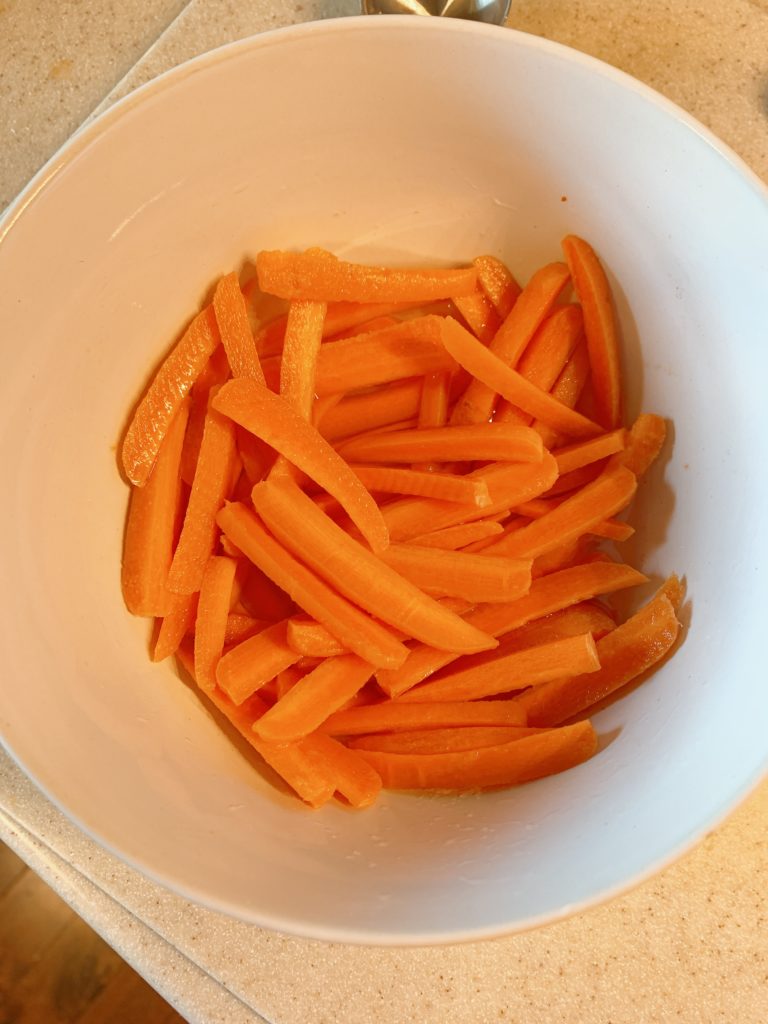
In this recipe I use pickled carrots for a little extra kick of flavor. Thinly sliced pickled radish is another great addition. Not a fan of pickled flavor? Throw your un-pickled carrots in with the broth to cook.
I love knowing that our entire family is getting plenty of nutrients in one simple meal. My four year old loves soup, and my 7-month old gets a deconstructed version of this recipe.
We get about 3 days worth of meals from this recipe, and it’s easy to freeze.
I also love that it incorporates plenty of anti-inflammatory foods and spices. I feel great after I eat it.
Are you a soup fan? Do you have it as a meal or as a side dish?
Melissa
PS You can find me on Social Media: @BenderFitness and on Facebook: @MelissaBenderFitness and Jesse is on Instagram: @BenderCrosby1
PPS If you want to help support BenderFitness so we can keep bringing you new workouts, your donation is greatly appreciated: https://www.patreon.com/BenderFitness.
Recipe:
Pickled Carrots:
This step is optional. You can use regular carrots in your broth bowl, but I like the zing that the pickled carrots add. Thinly sliced radishes are a great addition to the carrots.
Make the pickled carrots first and set aside. Put the carrots in a medium bowl, add vinegar, sugar and salt and pepper. Cover and set aside. You can refrigerate the ingredients overnight if you prefer a stronger pickle.
Chicken Broth (3 lb)
Extra Virgin Olive Oil
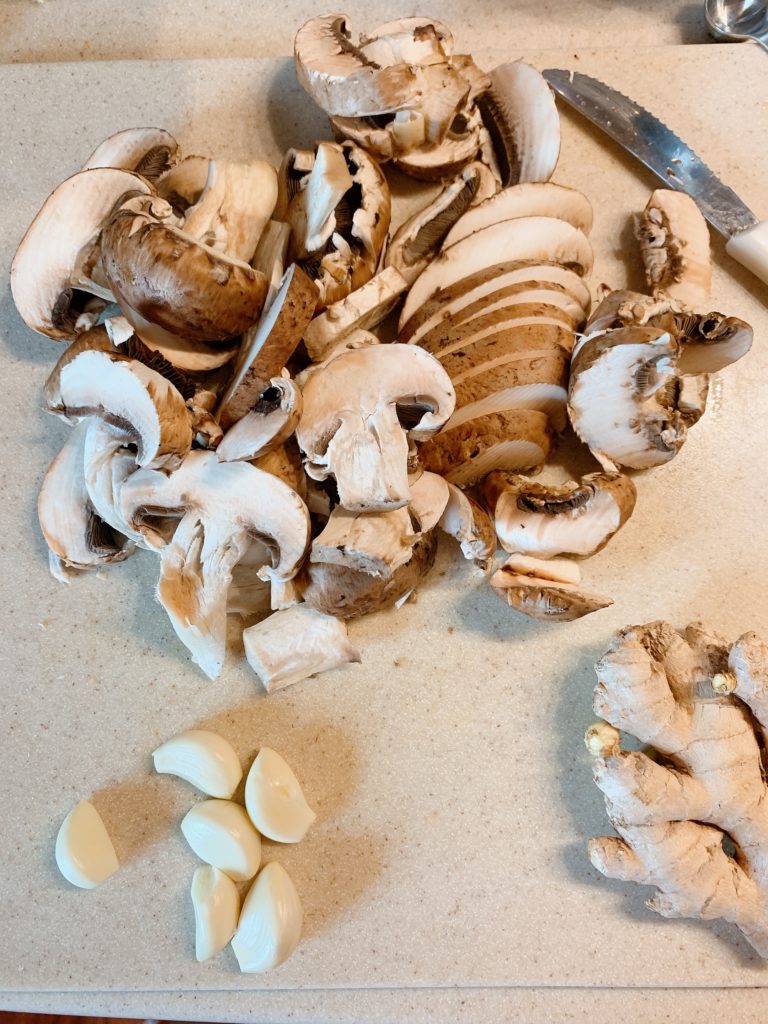
1 teaspoon minced fresh ginger
5 cloves minced garlic
1 8 oz. container Baby Bella Mushrooms-Sliced
2 Tablespoons Fish Sauce
2 Tablespoons Soy Sauce or Coconut Aminos
2 teaspoons Sesame Oil
Baked chicken sliced
Two generous handfuls of Kale
Sliced cherry tomatoes
Brown Rice
Prepare brown rice according to directions.
In a soup pot heat extra virgin olive oil. Add minced garlic and heat until fragrant.
Add Mushrooms and cook until softened, stirring as needed.
When the mushrooms are heated add the fresh ginger. Stir.
Add Broth, Fish Sauce, Soy Sauce (or Coconut Aminos) and Sesame Oil. Stir.
Bring to a boil, then reduce heat to a simmer.
Add Kale and stir.
Slice Chicken. I bake my chicken with olive oil, garlic and ginger for added flavor.
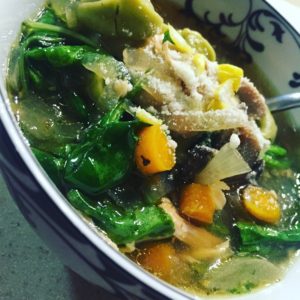
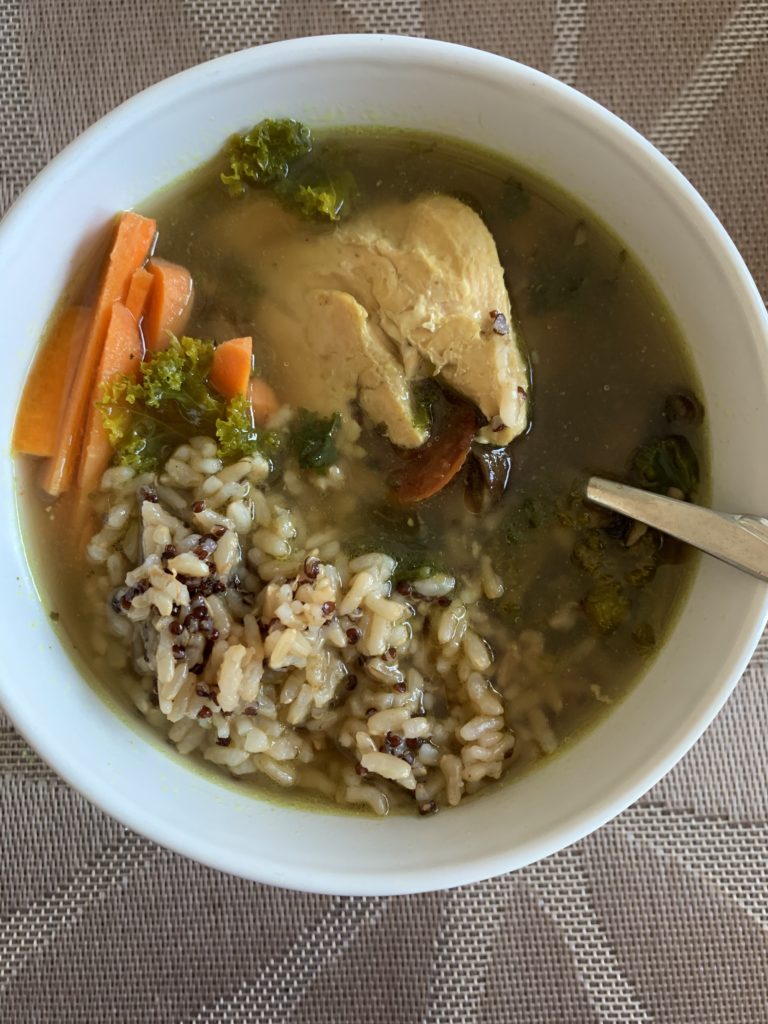
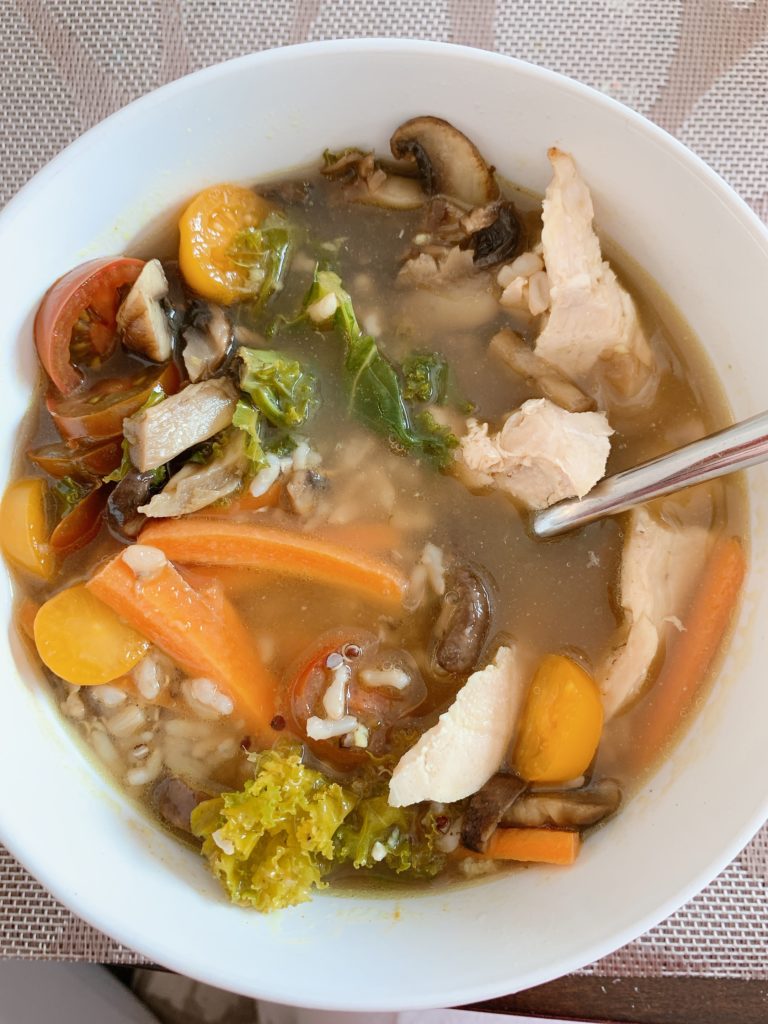
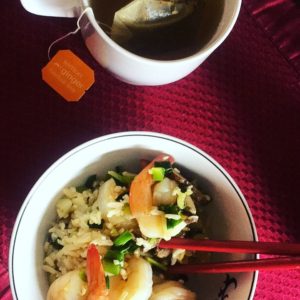
In a soup bowl: Add brown rice, sliced chicken, pickled carrots (removed/drained from the vinegar), and sliced tomatoes. Top with the cooked broth, kale and mushroom mix.
You’re ready to enjoy! I hope you liked it.
Did you make any modifications to the recipe? Let me know in the comments.
Mushrooms, Garlic and GingerSliced TomatoesReady to enjoy!
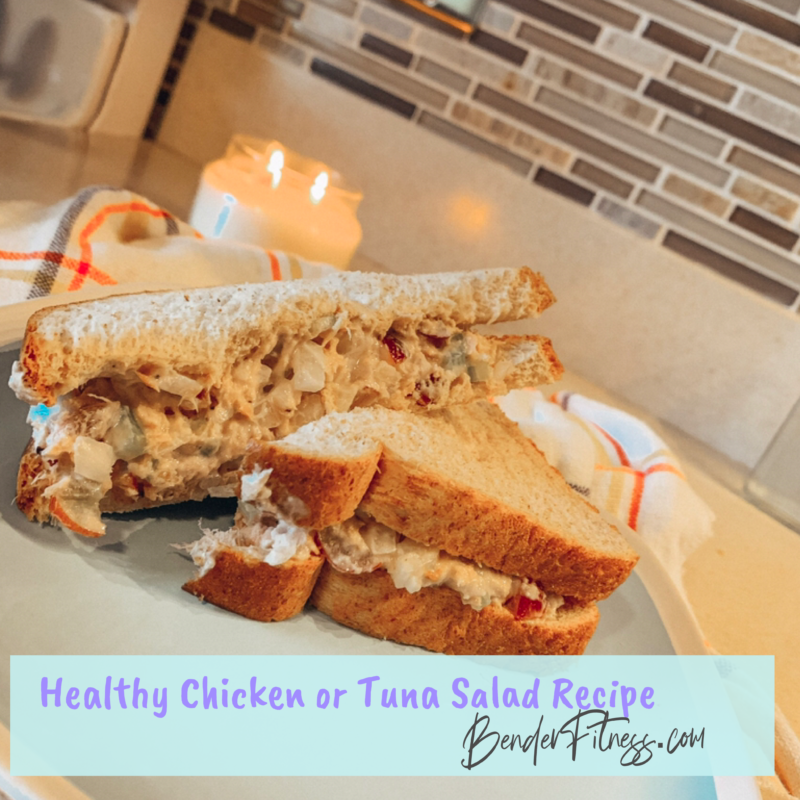
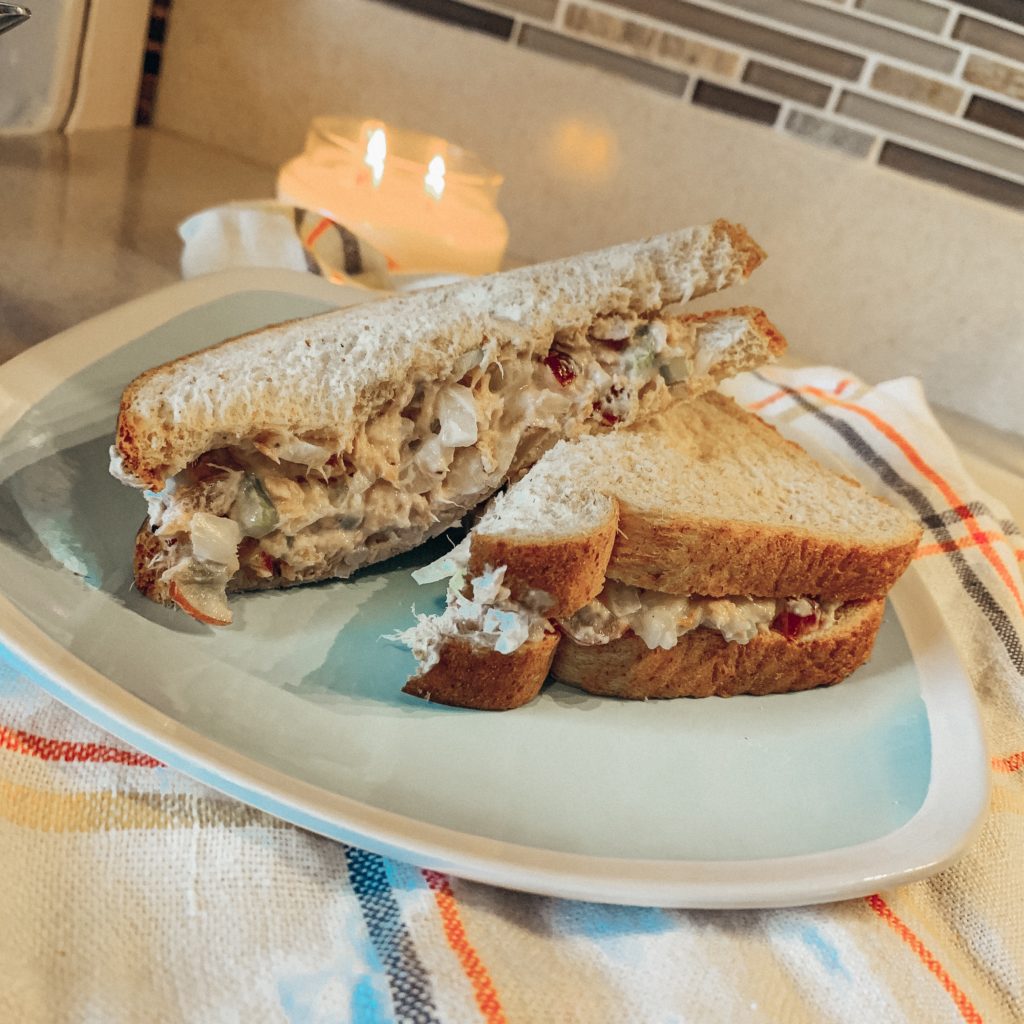
It’s so delicious! I love it in a sandwich, on a salad, or even served with some crackers. Heck, I like it enough to eat it with a fork, straight out of the bowl!
However, I’m not a big fan of mayonnaise. I hate the smell and taste of mayo (unless it’s well hidden in a recipe), and it’s not the healthiest option.
One of my favorite mayonnaise substitutions is Plain Greek Yogurt. Avocado is another great option! (Have you tried my Avocado Curry Chicken Salad recipe? It’s delicious!)
This recipe is a simple and nutrition loaded twist on a classic. It’s high in protein, and very filling.
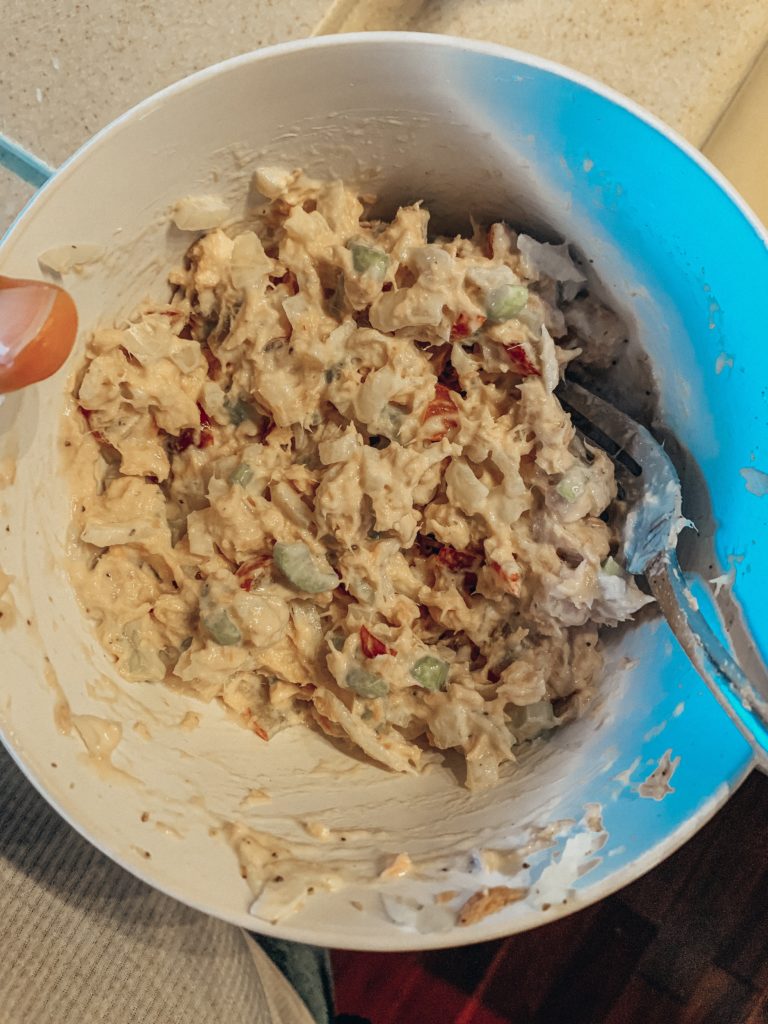
I love the combination of fruit and veggies mixed into the tuna/chicken salad. The texture is interesting, and the flavor combination is so tasty! Plus, it’s a great way to add some extra fruit and veggies into your day.
Normally, I load my sandwiches with fresh baby spinach, but I ran out! Even without the extra greens, this sandwich was the perfect combination of sweet and savory, and an all around winner.
Do you have a favorite healthy variation on a classic Tuna or Chicken Salad recipe? Let me know in the comments below.
I hope you enjoy it!
Melissa
PS You can find me on Social Media: @BenderFitness and on Facebook: @MelissaBenderFitness and Jesse is on Instagram: @BenderCrosby1
PPS If you want to help support BenderFitness so we can continue to share and create Free Workouts, your donation is greatly appreciated: https://www.patreon.com/BenderFitness.
PPS I recently created an Amazon Shop. It includes some “Must Have” workout equipment, kitchen tools, books I’ve enjoyed, fashions I love and fun household decor items. This is an affiliate link: that means BenderFitness makes a small commission when you purchase an item. If you would like to check it out you can do so here: www.amazon.com/shop/benderfitness
Chicken or Tuna Salad
Ingredients:
2.5-3.5 oz canned chunk lite tuna in water or chicken
1/2 celery stick thinly sliced
1/4-1/2 small onion (to taste)
1/4 cup plain Greek yogurt
1 teaspoon lemon juice
4-8 grapes thinly sliced
Salt and Pepper to taste
Note: This Recipe is also delicious with thinly sliced and chopped apple.
Optional (for sandwich):
Two slices whole grain bread
Spinach or mixed Greens
In a bowl, combine all ingredients.
Serve and enjoy as a sandwich, over salad, with crackers or on its own.
As you know, I’m a big fan of vegetables. I love how nutritious and colorful they are, and it’s a lot of fun coming up with new ways to incorporate veggies into our meals.
Of course, one of the easiest way to get a lot of vegetables in one serving is to add them to soup. Which is perfect, because soup has been a big pregnancy craving for me.
Throughout the first trimester I have been very sick, so I try to incorporate as much nutrition as possible, especially when I am actually craving a meal.
This soup is loaded with carrots, kale, green beans, chick peas, tomato, peppers and green onion. Remember, the different colors of the vegetables you consume means that you are getting in a wider variety of nutrients.
I played a bit fast and loose with the ingredients and worked with what I had on hand, which meant mixing two types of broth. The result was absolutely delicious, but you can always use broth of your own choice. Pregnancy cravings don’t necessarily want to wait for a run to the supermarket to get matching ingredients.
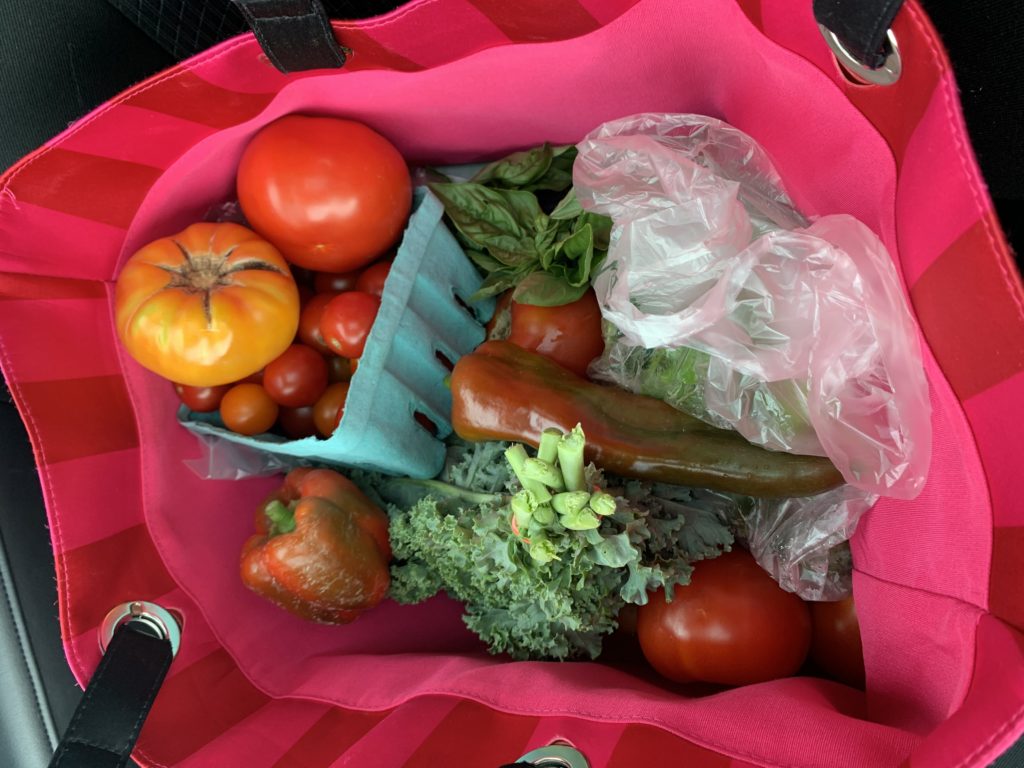
Weekly CSA (Community Supported Agriculture) Box.
All of the vegetables that I used were locally grown. I get a weekly CSA Box from the University where I teach. It’s part of an amazing program that teaches students sustainability and growing techniques. If you have any farms locally, I recommend reaching out to see if they do CSA boxes. Another great option, is buying your vegetables at a Farmers Market.
Wherever you get your vegetables from, be sure to wash them well and eat them frequently! I hope you enjoy today’s soup recipe.
Let me know what you think, and any modifications you make. This can easily be adjusted to be Vegan or Vegetarian friendly by using vegetable broth and vegan potstickers.
Have fun! Melissa
PS You can find me on Social Media: @BenderFitness and on Facebook: @MelissaBenderFitness and Jesse is on Instagram: @BenderCrosby1
PPS If you want to help support BenderFitness so we can continue to share and create Free Workouts, your donation is greatly appreciated: https://www.patreon.com/BenderFitness.
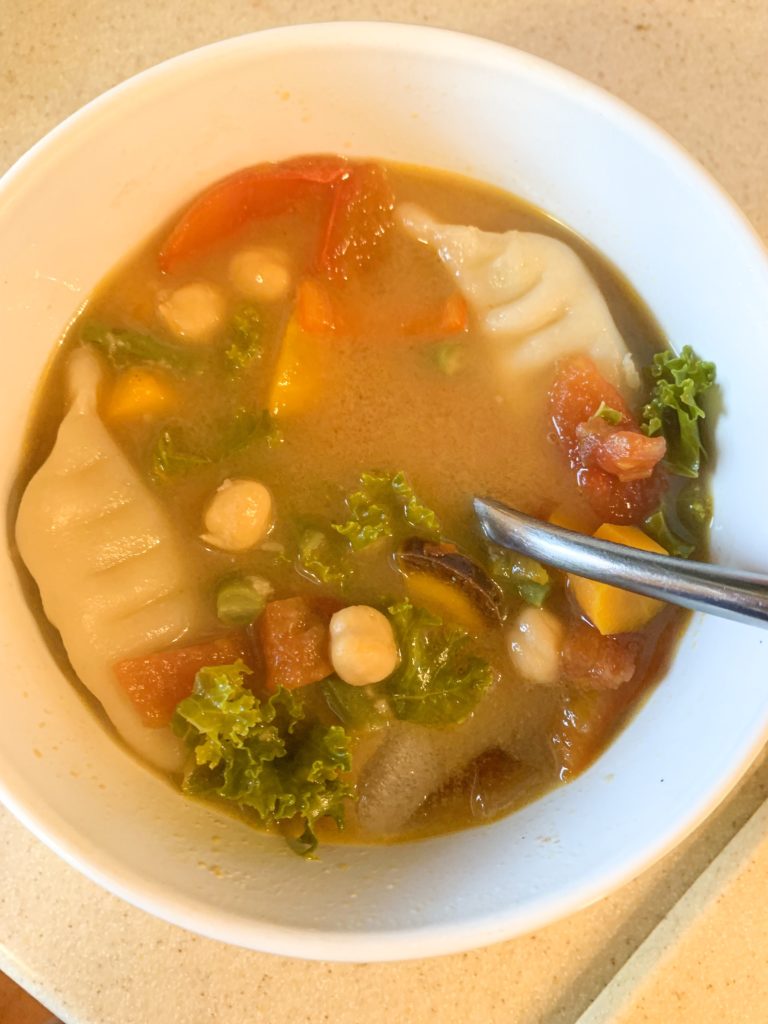
Vegetable Soup with Chicken Potstickers 🥟
*I didn’t measure all of the ingredients, but I like a hearty vegetable filled soup. I also worked with the ingredients I had on hand because my pregnancy cravings for soup are intense!*
Ingredients:
5 cloves of Garlic
Extra Virgin Olive Oil
Carrots chopped 🥕
Tomato diced 🍅
Large red pepper sliced 🌶
Kale removed from stem and chopped 🥬
1 can Garbanzo Beans (chick peas) drained and rinsed
1 handful fresh green beans chopped
3 green onions chopped
1 package of chicken potstickers 🥟(I bought mine from Aldi)
2 35-fl. Oz. containers of broth (I used one container of Ramen broth and one container of vegetable broth)
You can easily customize this recipe with vegetables and broth of choice. You can substitute vegetarian potstickers (or omit them from recipe) to make this vegetarian or vegan friendly.
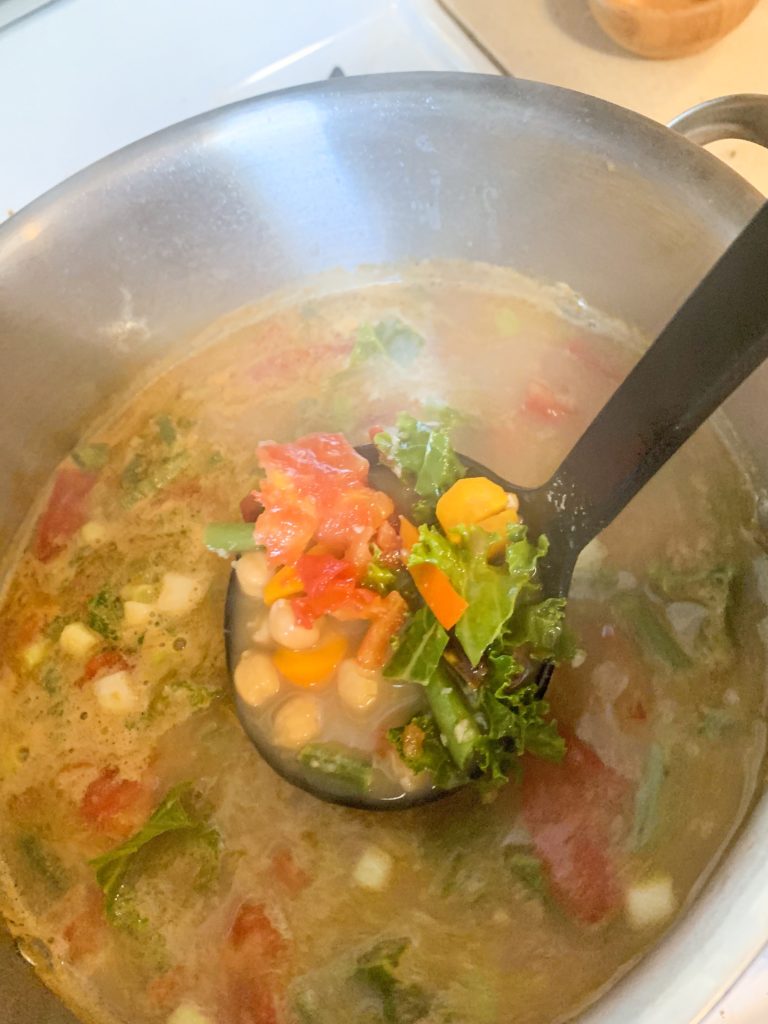
Put oil into the bottom of a soup pot.
Add minced garlic and heat until fragrant over medium high heat.
Add broth.
Add vegetables, starting with carrots and harder vegetables.
Bring to a boil, and boil until carrots are cooked through.
Add potstickers. (I also added the potsticker/dumpling sauce to the broth).
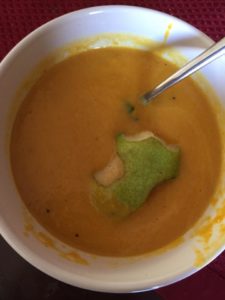
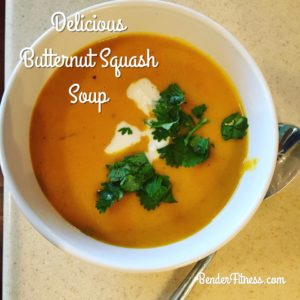
Are you ready for something delicious? As the weather turns cold I find that I crave soup. This week alone I have made Chicken Vegetable Soup and this tasty Butternut Squash Soup.
Butternut Squash is stock full of vitamins, and is a great addition to a healthy diet. I try to incorporate plenty of different colors into my food choices, because that means I am getting a variety of vitamins and minerals. Butternut Squash is high in potassium, fiber, vitamin A, manganese, vitamin C, Iron, Folate, Zinc, and more!
So let’s talk a little bit about what I went through to make this bowl of deliciousness. This is not a hard recipe. It’s actually pretty simple. Until you add a curious 17-month old toddler into the mix. My baby is now tall enough to reach things on the counter, even when they are pushed back away from the edge. This made chopping the butternut squash an adventure. He is especially taken with my orange chopping knife, and repeatedly requested “That! That!” Luckily, he was distracted by the music making ability of banging two whisks together.
My son loves helping me cook, and although he understands the concept of “hot” I have to frequently remind him to stay away from the stove. In my hurry to get things done, before he could get into anything crazy or touch the stove in the .05 seconds while my back was turned, I overflowed my food processor. This led to a small volcano of soup. I somehow managed to keep my son out of the overflow of Butternut Squash puree, which involved dancer like dexterity and convolutions.
Finally, after cleaning the kitchen, I sat down to enjoy this delicious soup. It tasted as good as I hoped, but a few bites in my son decided to add his own culinary twist to my meal. He placed his half eaten pear into my bowl.
I share this story as a reminder, that as beautifully presented as things look on Instagram, somethings things are a lot crazier and more realistic behind the scenes. Messes are made. Life can be wonderfully messy, but sometimes that is what keeps things interesting. Maybe a little pear puree would have been a good addition to this recipe. Or maybe, things just go a little wonky sometimes, and that’s okay too.
I hope you enjoy the recipe! If you try it (or make any tasty modifications!) let me know. I hope you enjoy it as much as I did! If you haven’t already, don’t forget to check out this week’s workout schedule: 5 Home Workouts to Try This Week.
Melissa
PS You can find me on Social Media: @BenderFitness and on Facebook: @MelissaBenderFitness and Jesse is on Instagram: @BenderCrosby1
For my non-fitness related posts I am on instagram as @Melissa_Bender_Life
PPS If you want to help support BenderFitness so we can get a new camera & new equipment & make our site more sustainable your donation is greatly appreciated: https://www.patreon.com/BenderFitness
Ingredients:
-1 Tablespoon Coconut Oil (you can use olive oil if you prefer)
-1 Onion-diced
-1 Medium Butternut Squash Peeled and Cubed
-2-3 Cups Vegetable Broth
-Sea Salt
-Black Pepper
-Curry Powder (I used yellow)
-Turmeric
-Ground Cinnamon
-1 14-oz can Coconut Milk (use lite for a lower calorie soup, regular for a creamier soup-If you decide to use a thinner milk/milk substitute you will have to decrease the amount of milk)
-1-2 Tablespoons Maple Syrup
Optional Garnish:
-Pumpkin Seeds
-Full fat coconut milk
-Cilantro or Fresh Herb of Choice (I used cilantro because I had it on hand)
Directions:
In a large soup pan add coconut oil and onions. Sauté over medium heat, stirring frequently until onions shimmer.
Add cubed butternut squash. Season with salt, pepper, curry and cinnamon. (I used a dash of each and didn’t measure.) Stir to lightly coat squash with seasoning. Cover and cook 5 minutes, stirring occasionally.
Add coconut milk, vegetable broth and maple syrup.
Bring to a light boil. Once boiling reduce flame to low. Cover and simmer for 15-18 minutes-until squash is tender enough to easily stick a fork into.
Blend until creamy. (this is easiest with an immersion blender). If using a regular blender: transfer to blender in batches and puree until creamy. Return to pot.
Cook on low, and add additional seasoning to taste. (I didn’t add any extra seasoning, but everyone has different taste preferences.)
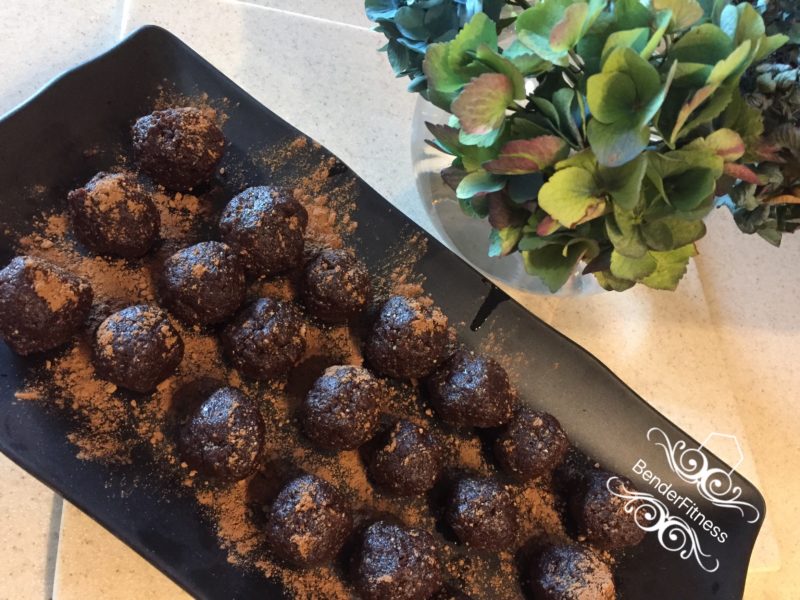
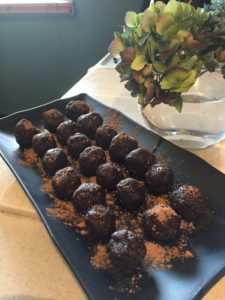
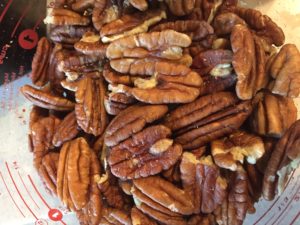
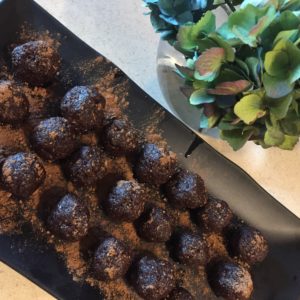
I just made a batch of these delicious Chocolate Bites. They are a healthy alternative dessert that I don’t feel bad giving to my toddler.
The combination of Dates and Nuts means this recipe is great for digestion, has plenty of Fiber, Vitamins and Minerals. It’s easy, requires no cooking, and is quick to make. These days I always seem to be in a hurry, so speed and ease are important.
I have tried this recipe with Pecans, Almonds, Walnuts and a mixture of all three. The pecan version is my favorite, but you can substitute a different type of nut if you prefer. Let me know if you try it, and how you like it! I like tweaking recipes, until I get them just right. I was thinking of attempting a Mint Chocolate version of these. If that’s a recipe you’d like to see let me know in the comments.
Yummy Pecans!
I hope you enjoy this treat as much as we did.
Melissa
PS You can find me on Social Media: @BenderFitness and on Facebook: @MelissaBenderFitness and Jesse is on Instagram: @BenderCrosby1
For my none fitness related posts I am on instagram as @Melissa_Bender_Life
PPS If you want to help support BenderFitness so we can get a new camera & new equipment & make our site more sustainable your donation is greatly appreciated: https://www.patreon.com/BenderFitness
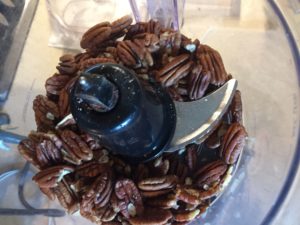
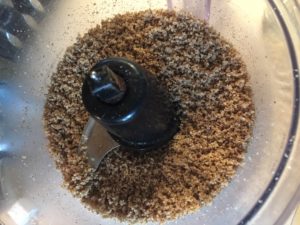
Put nuts in food processor until finely ground.
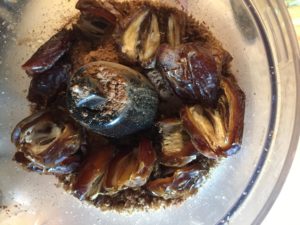
2. Add all other ingredients and process until it forms a sticky dough like texture.
3. Roll into balls.
4. Optional: sprinkle or roll in cocoa powder.
5. Chill in refrigerator or freezer and serve.
I have been meaning to post this recipe for ages! It’s simple to make, and very delicious. This is a great substitution for anyone looking for a healthy alternative to fried rice.
When I first made it, and told my husband what it is his eyes grew wide with fear. He isn’t a fan of cauliflower. “Did I do something to make you mad?” He asked me. “Because first it was cauliflower mashed potatoes, and now this.” I reminded him that he liked the cauliflower mashed potatoes, and he grudgingly agreed. I told him if he didn’t like it I wouldn’t be offended, as long as he gave it a try, and reminded him that we have plenty of cereal, and other foods he could have instead.
The result? He loved it, wolfed it down, had seconds, and has since requested that I make it more often.
I have made this dish with no meat, with shrimp and with chicken. It was delicious each way. You can customize it a bit by changing which vegetables you add. It’s great as a side dish, or a main course.
I normally use fresh cauliflower, but when I am in a hurry I sometimes use the microwaveable steam bags of minced cauliflower, and that works as well. I just cook the cauliflower in the microwave, and decrease the cooking time on the stove.
Don’t be afraid to make the recipe your own! I rarely ever try a recipe without modifying something. If you have a modification that turned out to be delicious, please post a comment to let us know what you tried. You can always tag us in your photos on social media and let us know what you think!
Melissa
PS You can find me on Social Media: @BenderFitness and on Facebook: @MelissaBenderFitness and Jesse is on Instagram: @BenderCrosby1 Maverick on Instagram: @MaverickBender
PPS If you want to help support BenderFitness so we can get a new camera & new equipment & make our site more sustainable your donation is greatly appreciated: https://www.patreon.com/BenderFitness.
Cauliflower Fried Rice
Serves 2-3
Ingredients:
2 1/2 cups minced cauliflower (you can mince by hand, with food processor, or buy a package of minced cauliflower at the supermarket)
1 Tablespoon minced garlic
2 tablespoons sesame oil
1 onion chopped
Frozen peas (optional)
Carrots chopped or minced
2-3 Tablespoons Less Sodium Soy Sauce (or more to taste)
2 Eggs Beaten
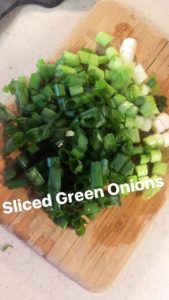
2 tablespoons green onion (optional)
Handful fresh baby spinach (optional)
*Optional You can add chicken or shrimp to this recipe to create Chicken or Shrimp Fried Rice.
Directions:
In a wok or large pan over medium flame, heat oil and minced garlic until garlic is fragrant.
Add onions, and cook until they begin to soften.
Add carrots and cook until they begin to soften.
Add cauliflower. Stir ingredients occasionally to ensure food is cooked evenly.
Add frozen peas if using, stir occasionally until food is evenly heated.
Add 2-3 Tablespoons of Soy Sauce (or more to taste), and fresh ground black pepper to taste.
While stirring, slowly, mix in two beaten eggs.
If you are adding spinach do so now, and allow spinach to wilt.
You are ready to serve your cauliflower fried rice! Optional: Garnish with 2 Tablespoons of chopped green onion.
*If you would like to add chicken or shrimp to this recipe you can either pre-bake your chicken and dice it, adding it in after the frozen peas. You can also choose to cook chicken or shrimp in a separate pan with some garlic and olive oil.
Today let’s talk about diet. (If you are looking for today’s workout you can find it here: Weekly Workout Schedule). I’m not talking about going hungry, or putting locks on your refrigerator. I’m talking about what you put in your body.
About 3-4 weeks ago I made some changes to my diet. I started eating primarily anti-inflammatory foods, and cut out foods that are linked to inflammation. When I started, I wasn’t sure if I would notice a change. Just a few weeks later, I am down 6 pounds, and 3 inches on my waist. Since having postpartum gallbladder issues over the summer, I have been fighting bloating and 5-7 pound weight fluctuations over the course of the day.
So what is the verdict after trying these diet changes? I feel better! My hands and stomach aren’t swelling up, and my weight isn’t having extreme fluctuations throughout the day. My energy is better, and my husband notices a big difference in how he feels too.
Inflammation is linked to cancer, arthritis, asthma, colitis, Alzheimer’s, Crohn’s disease, sinus problems….and many more. It is also linked to premature aging of the skin and acne.
So what is the anti-inflammatory diet? I have provided some information and a grocery list below. The list is not all inclusive. There are other fruits and veggies that are still great options, but I created the grocery list as an over view.
I have been eating foods that follow these guidelines, but I still allow for some variation. For example, I love frosted shredded wheat cereal. Even though it has refined sugars I still eat it sometimes. Peanuts are inflammatory, and giving up Peanut Butter was a big one for me. I still have it occasionally, but I ensure that it is one serving size.
These are guidelines. You can adjust it to fit your needs and lifestyle, but incorporating these changes has been very beneficial for me. I will be sharing more recipes that fit into the anti-inflammatory diet.
If you have questions about the diet, post them below. I have started sharing more recipes on my Snapchat & Instagram MyStory: @BenderFitness.
Melissa
Snacking on lots of fruit & veggies.
Anti-Inflammatory Diet Basics:
Avoid or Eliminate: Dairy, Red Meat, Refined Sugars, Processed Foods, Fried Foods, Refined Carbohydrates, Sweetened Beverages
Utilize Anti-Inflammatory spices in your meals at least 1X per day.
Eat Hormone Free Meats, plenty of fresh vegetables and fruit. For fruits and veggies, if it is thin skinned (i.e. blueberries) buy organic if possible. Always rinse fruit and veggies before eating/prepping.
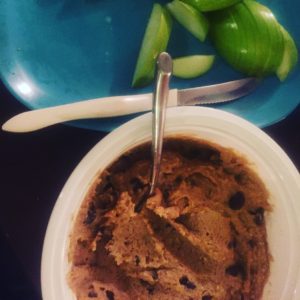
You are in for a treat with the recipe below. It’s delicious, it will satisfy your sweet tooth & no one will know it’s healthy unless you tell them.
I have served this when we have friends over, and I brought it with me to my family’s Thanksgiving. My nieces (6 and 3) both loved it!
The main ingredient? Chick Peas! So you are getting protein and fiber in this recipe! Chick Peas, also known as Garbanzo Beans, are rich in antioxidants and are a great anti inflammatory food.
The protein and fiber in Chick Peas will also leave you feeling fuller longer, and curb cravings. This is a great alternative to traditional Cookie Dough dips. Plus you aren’t risking salmonella when you eat it! It is dairy free and vegan friendly if you use agave instead of honey. You can probably use raw maple syrup in place of agave or honey, but I haven’t tried it. If you decide to test it out leave me a comment below and let me know how it is!
I have made this dip with multiple nut butters, and it has been delicious with each one. I tried it with Stevia in the Raw in place of honey (and added almond milk until it was the desired consistency), but I didn’t like it as much.
I have also tried it with a mix of brown sugar and Stevia, but in my opinion it is best with the honey.
As I continue to trial different variations I will update the recipe to let you know if I find something that I like better.
I hope you enjoy the recipe!
Melissa
PS You can find this week’s workout schedule: https://www.benderfitness.com/weekly-workout-schedule-december-11-17
Ingredients:
1 Can of Chickpeas
1/8 tsp salt
1/8 tsp baking soda
2 tsp vanilla extract
1/4 cup Peanut Butter (or nut butter of choice)
3 tablespoons oats
1/3 cup to 2/3 cup Honey or Agave (depending how sweet you want it)
1/3 cup chocolate chips (I use dark chocolate chips)
Directions:
Combine all ingredients, except chocolate chips, in a food processor and blend until smooth.
Stir in chocolate chips.
Eat & Enjoy!
I serve my dip with sliced apples, but this would also be tasty with graham crackers.
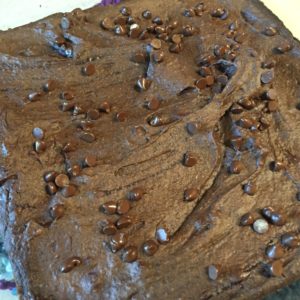
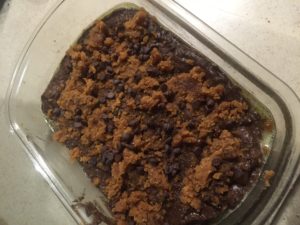
If you like rich, delicious, fudge-like chocolate brownies you are in for a treat! This recipe is so good, and it’s a healthier way to indulge your sweet tooth! I served these to several friends, without telling them the secret ingredient, and they had no idea they weren’t eating “regular” brownies. In fact, everyone had at least two brownies, because they liked them so much!
The brownies have a thick, chocolatey texture, and cut beautifully. In fact, they get even more rich and delicious when you refrigerate them before serving!
Jesse ate the last of these brownies yesterday, and immediately wanted me to make more. I offered to send a dish of brownies to work with him, but he declined because he didn’t want to share (don’t tell his co-workers!)
I like my brownies with a delicious cup of coffee, and Jesse likes to pair his with a glass of unsweetened vanilla almond milk.
Sometimes you just want to have sweets. I like to make my desserts healthier without skimping on the flavor. You won’t be able to stick to a healthy diet if you aren’t enjoying what you are eating.
I hope you like the recipe! If you try it, tag me in your photos, or let me know if you tried any different modifications to the recipe. It would also be delicious topped with some walnuts. Jesse loves chocolate and raspberries, so I may have to see if I can make a raspberry drizzle to try this with.
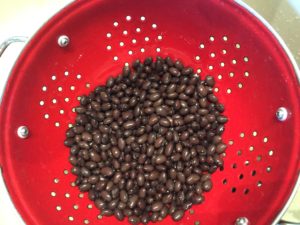
-1 can (15 oz) Black Beans (well rinsed and drained) (about 1 1/2 cups)
-2 Tablespoons Cocoa powder
-1/2 cup Quick Oats
-1/3 cup honey (agave or maple syrup can also be used)
-1/4 teaspoon salt
-pinch of stevia
-1/4 cup coconut oil
-2 teaspoons vanilla extract
-1/2 teaspoon baking powder
-1/2 cup chocolate chips (plus a few more to sprinkle on top of the brownies)
Ready to go in the oven!
Optional Ingredients for PB topping:
-1/4 cup natural Peanut Butter or nut butter of choice (You can also omit the ingredients below and just drizzle plain natural PB over the top of the batter before baking)
-2 Tablespoons Unsweetened Vanilla Almond Milk
-Pinch of Stevia in the Raw
Directions:
Preheat Over to 350 degrees F.
Make sure your black beans are well rinsed and drained
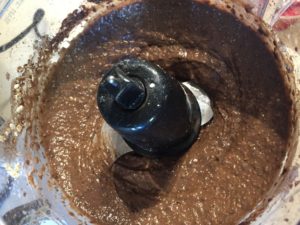
Combine all ingredients for Brownies, except chocolate chips in a Food Processor. Do not put in PB topping ingredients. Process until smooth (it will take a while!) Stop and check it, and push down any of the dry ingredients on the side of the food processor to make sure you are getting a nice texture for your batter.
When smooth texture has been reached fold in chocolate chips.
For thicker brownies use 8 X 6 inch baking pan. For thinner brownies use 8 X 8 inch baking pan. Grease pan, and pour in batter.
Optional Step for Peanut Butter Topping: In a separate bowl combine PB, Stevia, and almond milk. Mix until crumbly texture is achieved. Distribute evenly over the top of the brownie batter. If using plain Peanut Butter, drizzle over batter with a spoon.
If desired sprinkle with additional chocolate chips.
Bake for 18-minutes. For thicker brownies increase to 20-minutes. Let cool 10-15 minutes before cutting. If the brownies appear undercooked don’t worry! Let them cool in the fridge and they will firm up to have a rich, decadent, fudge-y texture.
Enjoy!
Nutrition Information Obtained from Inputting Recipe into MyFitnessPal:
When cut into 10 servings Without PB Topping: Calories: 163 Fat: 7g Carbs: 22g Fiber: 6g Protein: 4g
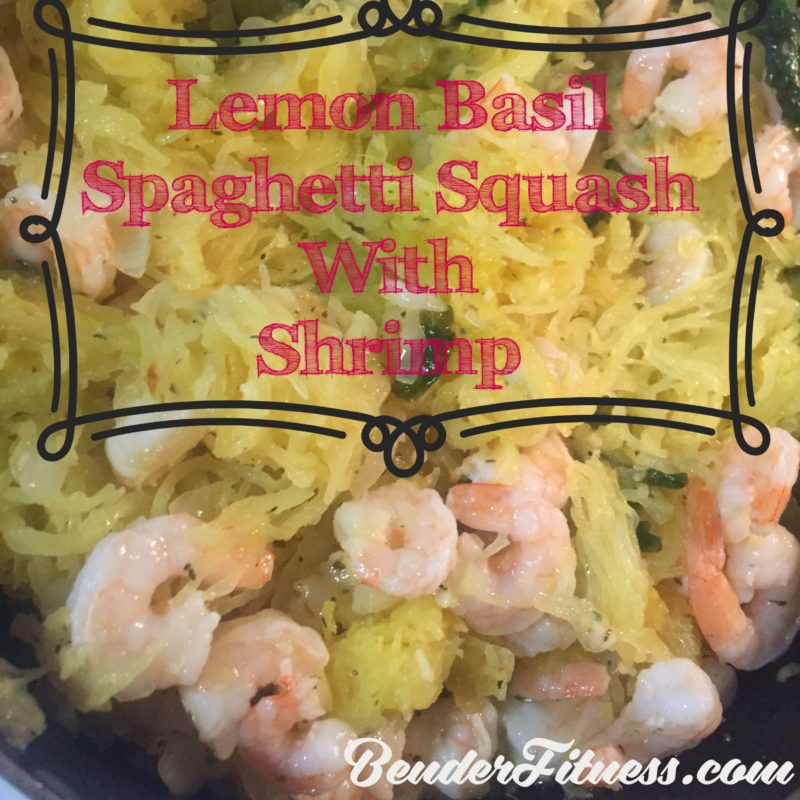
First of all, if you are looking for today’s workout you can find it here: Arms, Back & Cardio Workout. If you have already worked up an appetite, you are in for a treat with today’s recipe! It’s so delicious that I can’t wait to make it again! My friend, Stephanie, shared this recipe with me, and gave me permission to share it here with all of you. She is one of the best cooks I know, so it’s always a treat when she decides to share a recipe. Personally I love almost anything that has shrimp and/or lemon. This combination is scrumptious.
Spaghetti Squash is delicious, and full of nutrients, and fiber. It’s a great alternative to use in dishes that normally use pasta. There are only 42 calories in a one cup cooked serving of spaghetti squash. In comparison, one cup of cooked spaghetti has around 200 calories. After baking the squash, the noodles separate into spaghetti like strands, when scraped from the rind with a fork.
Some of the health benefits: High in Fiber, Vitamins C & A, Pottasium, Calcium, beta-carotene, Folate, Omega 3 and Omega 6. Remember, the more colorful your diet is, the wider the range of nutrients you are consuming.
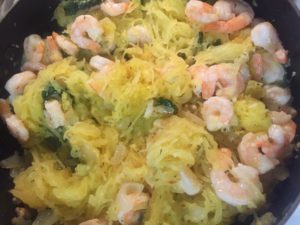
I didn’t check my spaghetti squash at 45-minutes, so the noodles were a bit softer, but they were still delicious and had a nice texture. Longer cooking time will lead to softer noodles. My notes about changes I made to the recipe are included with the ingredients list below.
Do you have a favorite way to prepare spaghetti squash? Share it in the comments below! I am always looking for great alternatives!
Melissa
Recipe shared by Stephanie:
Ingredients:
-1 spaghetti squash
-1/2 to 1 tsp olive oil (estimate)
– 2 T minced garlic (I used the jar variety for this)
-salt and pepper
-2# raw jumbo shrimp, peeled and tails off (I actually used frozen/pre cooked and skipped the baking step for time)
-1T herbs de provence olive oil (could use regular) *I used 2T extra virgin olive oil and mixed in Herbs de Provence dried basil and gently heated it.
-1T garlic olive oil (could use regular)
-1/4 to 1/2 small onion diced
-1/4 cup sliced mushrooms (optional-I was out so I didn’t use them this time)
-5-6 cloves of garlic minced
-1 tube of basil paste (I didn’t have this so I used dried basil mixed in with the Herbs de Provence & the olive oil)
-1T lemon zest
-Juice of 2 lemons
-1 tsp Penzey’s Florida seasoning (lemon pepper or similar would also work-I forgot to add this!)
-1/2 of fresh basil chopped (optional) *My fresh basil went bad, so I skipped this, and used some sautéed spinach.
-Pam cooking spray
** all measurements are an approximation aside from the garlic oil and herbs de provence oil. I don’t really measure my ingredients/seasonings when I cook**
Preheat oven to 400 degrees F. Cut spaghetti squash in half and remove seeds. Drizzle with small amount of olive oil and salt and pepper. Place a tablespoon of minced garlic on foil lined cookie sheet and place one half of squash over top of garlic face down (rind up). Repeat with other half of squash. bake at 400 about 45 min to 1 hr or until you can poke rind with a fork. Once done, scrape insides with a fork into a bowl to form “noodles” and set aside.
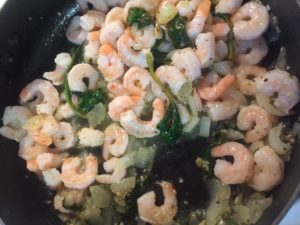
Peel shrimp and season with salt and pepper. spray large skillet with Pam and cook shrimp in batches in a single layer until pink. place on plate and set aside.
Add garlic oil and herbs de provence oil to skillet and saute onions and mushrooms. Then add lemon zest and garlic and saute another 1-2 mins. Add 1-2 good squeezes of basil paste (most of tube) and lemon juice and stir to combine.
Once sauce is combined and heated, add squash and shrimp and Penzey’s Florida seasoning (or Lemon Pepper-I actually omitted this and the flavor was still fantastic!) and stir to combine. Add fresh basil if desired.
Normally I use recipes as a guideline and end up changing a LOT. For this recipe I didn’t change much. It was just too darn good as it was! I love simple recipes that can be made in the crockpot. Especially having a newborn baby at home, this makes dinner simple!
Add to Crockpot and cook on Low 6-7 hours or High 3-4 Hours:
12 oz. boneless, skinless chicken breasts (I used a mix of breast and boneless thighs)
3 tablespoons olive oil
1 medium onion, chopped
8 oz. sliced baby bella mushrooms
1 cup carrots, chopped
4 garlic cloves, minced
1/2 teaspoon dried thyme
1/2 teaspoon dried oregano
1/2 teaspoon ground cumin
1 teaspoon dried parsley
2 chicken bouillon cubes
2 bay leaves
1 teaspoon salt
1/4 teaspoon pepper
8-9 cups chicken stock-I used no Salt Added
*Feel Free to Add Extra Veggies! If you add something let me know what it was, and how you liked it!*
Add during the last 20-Minutes of cooking prior to serving:
12 oz. fresh spinach tortellini (You can use tortellini flavor of choice) Uncooked****
4-6 cups fresh spinach, loosely packed (I love spinach so I say more is better!)
Squeeze one lemon or use 2 tablespoons lemon juice (plus more to taste)
Use as Garnish after soup is dished into Bowl:
freshly grated Parmesan cheese (optional garnish)
Fresh Ground Black Pepper (Optional-to taste)
lemon zest (optional)
Place chicken in the bottom of crock pot. Drizzle with olive oil.
Add all ingredients except tortellini, spinach, lemon juice, parmesan cheese, pepper and lemon zest to crockpot. Cook on Low 6-7 hours, or High 3-4 hours.
20-Minutes before serving shred chicken (you can do this while it is in the pot, or by removing chicken from the pot & shredding on a plate). Add tortellini, spinach and lemon juice.
Are you looking for something healthy and delicious to try out for dinner? This is a simple, healthy, and delicious recipe! It’s quick to make & doesn’t require a lot of clean up. I love healthy cooking, but I also love recipes that don’t take a lot of time to prep. Recipes get bonus points from me when they don’t create a lot of dirty dishes. This recipe meets all of the above criteria.
I also like that this dish can be served alone, as a side or paired with a protein of choice. You can easily make it vegan or vegetarian.
Be sure to wash your vegetables before slicing them.
If you try this recipe let me know what you think! Tag me in your photos on Instagram or Twitter: @BenderFitness or on Facebook @MelissaBenderFitness.
Enjoy!
Melissa
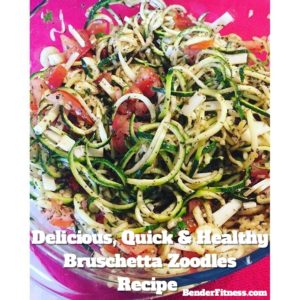
Bruschetta Zoodles
We will be having this with dinner tonight with some baked chicken.
I used a spiralizer to make the noodles.
Ingredients:
4-small zucchini
2 tomatoes diced
2 small cloves minced garlic
2 tablespoons of basil
2 tablespoons extra virgin olive oil
2 tablespoons balsamic vinegar
Fresh ground salt and pepper to taste
Optional: diced mozzarella cheese and 1/4 cup diced onion
* I was out of mozzarella so I diced two slices of Munster cheese. I was out of onion so I omitted it & it’s still delicious.
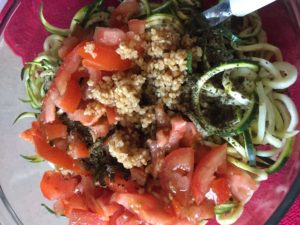
Spiralize the zucchini, and chop veggies and cheese.
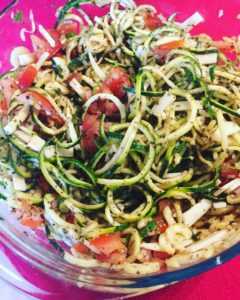
Combine all ingredients in a bowl and stir. Refrigerate to allow ingredients to marinate.
Delicious cold, or gently heat in a pan. Great served with cold or warm baked chicken (or protein of choice).
* Don’t overcook the Zoodles if you are heating. Zucchini gets soft fairly quickly, so monitor as you heat to ensure you are maintaining the desired texture/consistency.
It’s dinner time & I thought you might enjoy the meal I made tonight. I love vegetables & I try to incorporate them into all of my meals.
This meal can be served with or without the pasta. If you prefer to stick to Zoodles (Zucchini Noodles) that’s a great option.
The ingredient sizes below are estimates. I was creating the recipe and adding things as I went. Feel free to adjust. I made a large portion so we can have leftovers for lunch.
I hope you enjoy!
Melissa
PS You can also find me on Instagram & Twitter: @BenderFitness and on Facebook: @MelissaBenderFitness
Ingredients: Serves 4-6
Whole Wheat Pasta of choice
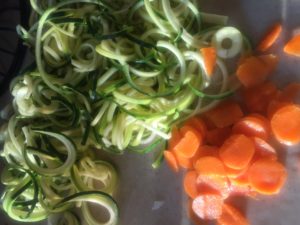
Zucchini Noodles (or sliced zucchini)-1 large or 2-3 small
Olive Oil-1 Tablespoon
Minced Garlic-1 clove or to taste
Diced Thin Sliced Onion-1/2 onion
Thinly Sliced Carrot-1/4 cup
Tomato Basil Pasta Sauce- 1 jar
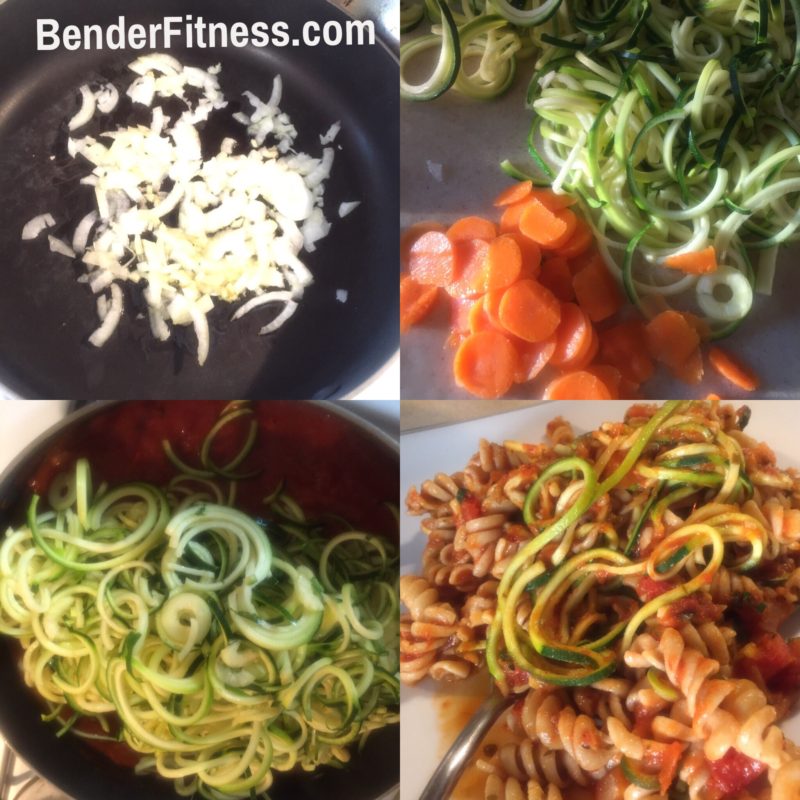
Boil Water & cook pasta according to directions.
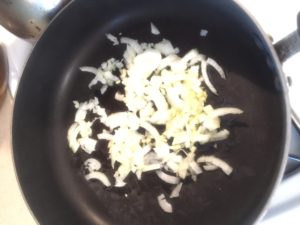
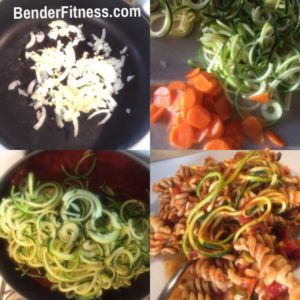
Sauté garlic in olive oil. Add onions and continue to sauté until fully cooked.
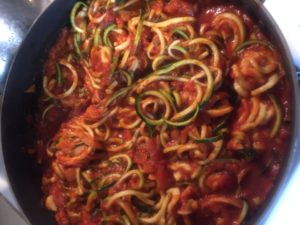
Add carrots. When cooked to desired texture add pasta sauce.
When pasta has about 3 minutes left to cook, add zucchini to sauce. Cook zucchini to desired texture. Mix everything together and serve over noodles, or skip the noodles and enjoy as is!


 Ingredients: